Body Paint6-3
|
Paints6-1
Body Paint6-3 |
Body Paint6-3
General
The 3-coat·3-bake (3C·3B) paint finishes give the CR-V a deep gloss and stunning finish. This manual provides information on paint defect, repair, and refinishing. Throughout, the objective is to explain in a simple yet comprehensive manner the basic items you should know about paint repairs. Select the correct material for the defect and repaint or refinish in the correct manner as described in this manual.
Basic Rules for Repairing a Paint Finish
To repair paint damage, always use the 2-part acylic urethane paints designated; polish and bake each of the three coats, as in production, to maintain the original film thickness, and to assure the same quality as the original finish.
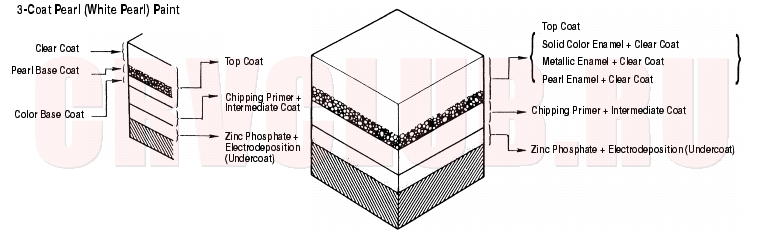
Outline of Factory Painting Process:
Features in Each Work Process
- Pretreatment and Electrodeposition
- In the pretreatment process, the entire body is degreased, cleaned, and coated with zinc phosphate by dipping.
- After the body has been cleaned with pure water, it is placed in an electrolytic bath of soluble primer (Cationic Electrodeposition).
- This produces a thorough corrosion inhibiting coating on the inner surface and corners of the body, pillars, sills, and panel joints.
- Chipping primer is then applied to the most susceptibles areas (see page 5-9) .
- Intermediate coat
- The intermediate coat is applied to the prepared surface for further protection against damage.
- Top Coat
- Enamel paint and either polyester or acrylic resin paint are used in the top coat for higher solidity, smoothness, brightness, and weather resistance.
Sectional View of Paint Coats:
Body Paint (cont'd)6-4
Refinishing Processes
Paint damage can appear in any form. Before making a repair, check the damaged area carefully, and determine the best procedure for repairing the damage. The following shows you refinishing methods for various types of paint damage or defects.
(1) = Indicates the best method depending on the degree of damage.6-5
Preprocessing of Painting
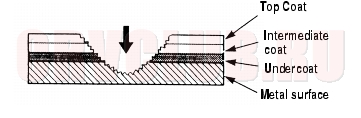
- Featheredging
- NOTE:
- The paint film damaged area should be sanded flat and smooth.
- If this is not done correctly the end results will not be acceptable.
Damage to metal surface:
Sand the damaged area flat and smooth.
Use the disc sander and #60~#80 disc paper.
Use the double action sander and #60~#80 disc paper.
Sand the area larger than the damaged area.
If a double action sander is not available, use a rubber pad and wet or dry sandpaper.
Use the flexible block and #280, #340, #400, #600 sandpaper.
Damage to undercoat, intermediate coat and top coat:
Sand the damage area flat and smooth
Use the double action sander and #180~#240~#320 disc paper.
- Preparation of metal surface
- Remove all corrosion from the damaged area.
Use a product that removes corrosion.
- Air blowing / degreasing
Use alcohol, wax, and grease remover.
Body Paint (cont'd)6-6
Treatment of Metal Surface
- Filling / drying
- Small cracks or pinholes in the sheet metal should be repaired with a body filler and sanded flat and smooth.
- Use the 2-part polyester resin putty.
- Mix the putty with the hardener in the correct ratio.
- Follow the body filler manufacturer's instructions.
- Mix the body filler and hardener quickly.
- Apply the body filler in several thin coats, without air bubbles.
- Do not try to cover the surface with one heavy coat.
- Apply the body filler over the damaged area with a putty knife using light pressure.
- After applying the body filler, allow 5 to 6 minutes of normal drying time, then force dry it with infrared lamps or other industrial dryer at 122°F (0°C)~140°F (60°C).
- NOTE: Follow the body filler manufacturer's instructions for drying time.
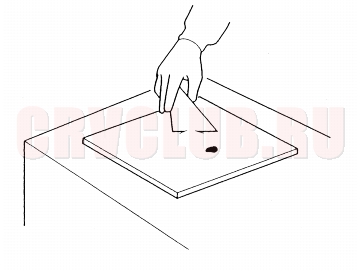
- Polishing
- The body filler is dry a white mark appears when the surface is scratched with your finger nail.
- Throughly sand the body filler surface
- Sand the surface evenly, particularly the area that was filled.
6-7
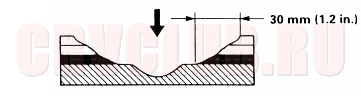
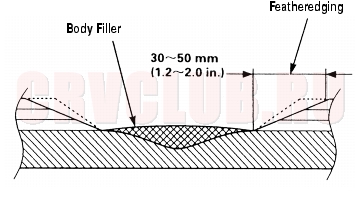
Featheredge the paint coat. Sand the body filler surface until the proper dimension are met.
Use the double action sander and #240~#320~#400 disc papers.
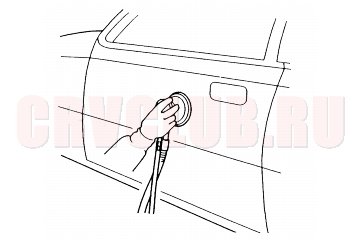
- Air blowing / degreasing
Use the alcohol, wax and grease remover.
- Also clean and degrease the surfaces where masking tape will be attached.
Undercoating6-7
- Masking
- Mask the area surrounding the damage to prevent over spray from the primer surfacer.
Use the masking tape and paper.
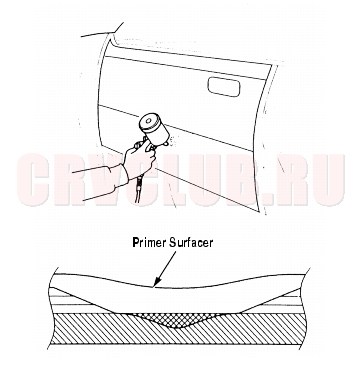
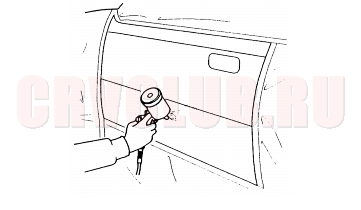
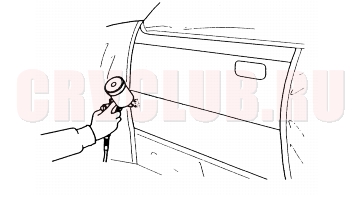
- Spraying the primer surfacer
- Spray the primer surfacer over a wider area than the body filler and the exposed surface of the paint film.
- Spray 2 to 3 coats to get 30 microns of thickness.
- Use the 2-part urethane primer surfacer and a spray gun.
- Mix the primer surfacer with the additive and solvent, and in the correct ratio.
- Follow the primer surfacer manufacturer's instructions.
- Drying
- After spraying primer surfacer, allow for 5 to 10 minutes of normal drying time, then force dry it with infrared lamps or other industriel dryer.
- NOTE: Follow the primer surfacer manufacturer's instruction for drying time.
Body Paint (cont'd)6-8
Undercoating (cont'd)
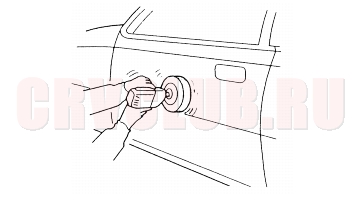
- Polishing
- Check that the primer surfacer has dried thoroughly, then sand the primer surfacer.
Use the double action sander and #320~#400~#600 disc papers.
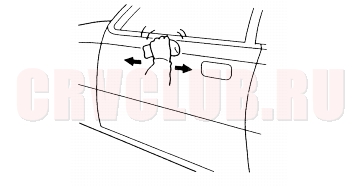
- Air blowing / degreasing
Use the alcohol, wax and grease remover.
- Also clean and degrease the surfaces where the masking tape will be attached.
Intermediate Coating6-8
- Masking
- Mask the area surrounding the damage to prevent over spray from the intermediate coat.
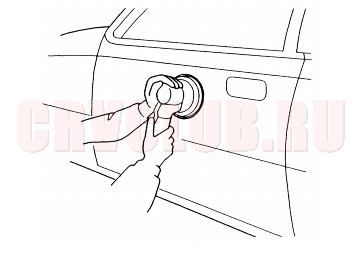
- Spraying top coat enamel
- Spray the top coat enamel over the surface until the primer surfacer is fully covered.
- NOTE: For the 3-coat pearl paint, spray the color base over the surface.
- Use the 2-part polyester urethane top coat enamel and a spray gun.
- Mix the top coat enamel with the additive and solvent, and in the correct ratio.
- Follow the top coat manufacturer's instructions.
- Drying
- After spraying top coat enamel or color base (3-coat pearl paint), allow for 5 to 10 minutes of normal drying time, then force dry it with infrared lamps or other industrial dryer.
- NOTE: Follow the top coat manufacturer's instruction for drying time.
6-9
- Polishing
- Check that the top coat enamel has dried thoroughly, then sand the top coat enamel.
Use the double action sander and #600~#800 disc papers.
- NOTE: Be careful not to polish down to the primer surfacer.
- When the painting repair (gradation) is almost done, polish the area that will be top coated.
Use the #2000 sandpaper and compound.
- Air blowing / degreasing
Use alcohol, wax, and grease remover.
- Also clean and degrease surfaces where the masking tape will be attached.
- NOTE: See page 6-11 and page 6-12 for the painting repair (gradation) of the 3-coat pearl paint.
Top Coating6-9
- Masking
- Mask the area surrounding the damage to prevent over spray from the top coat.
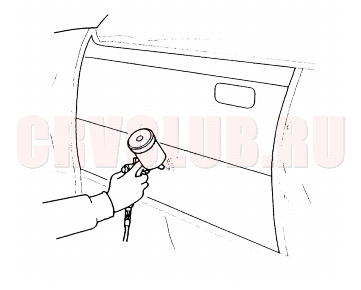
- Spraying top coat enamel / clear coat
- Spray 2 to 3 double coat until the intermediate coat is fully covered.
- NOTE: See page 6-11 and page 6-12 for the painting repair (gradation) of the 3-coat pearl paint.
- Use the 2-part polyester urethane top coat enamel and spray gun.
- Mix the top coat enamel with the additive and solvent, and in the correct ratio.
- Follow the top coat manufacturer's instructions.
- Drying
- After spraying the top coat enamel, allow it to air dry, then force dry it with infrared lamps or other industrial dryer.
- NOTE: Follow the top coat manufacturer's instructions for drying time.
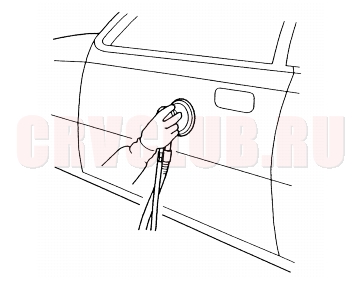
- Spraying clear coat
- Spray the top coat clear evenly over the surface of the top coat enamel. Do not try to cover the surface with one heavy coat.
Body Paint (cont'd)6-10
Top Coating (cont'd)
Drying After spraying the clear coat, allow it to dry for 10 minutes, then force dry it with infrared lamps or other industrial dryer. NOTE: Follow the top coat manufacturer's instructions for drying times.
- Polishing / buffing
- Check that the clear coat has dried thoroughly.
- The clear coat is cooled.
- Any adhesion or roughness on the top coat should be wet sanded and repaired.
Use the #1200~#2000 and crystal block.
- Polish any roughness caused by sanding.
- NOTE: Clean the top coat surface frequently so you don't damage the clear coat with the polishing particles.
Use a buffing towel, buffing wool, and compound.
- Finishes up with buffing.
- NOTE:
- Do not use a power buffer.
- Don't polish too much; use light hand pressure.
Use the buffing sponge, fine compound, very fine compound, then ultra fine compound.
- After buffing, remove the masking paper and tape, and thoroughly wash the entire vehicle.
|
Paints6-1
Body Paint6-3 |
При использовании материалов сайта, ссылка на Клуб Honda CR-V (RUSSIA) обязательна.
2006-2011