Front Side Frame / Outrigger3-9
|
Replacement3-1
Front Side Frame / Outrigger3-9 |
Front Side Frame / Outrigger3-9
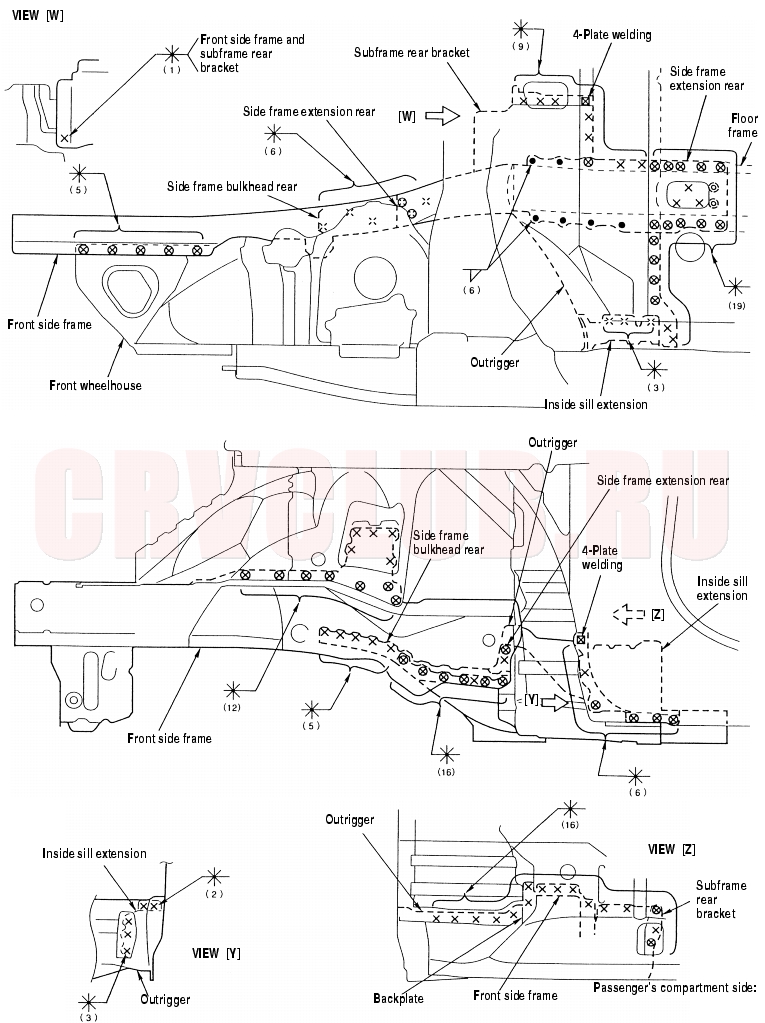
Mass Production Body Welding Diagram
Front Side Frame / Outrigger (cont'd) 3-10
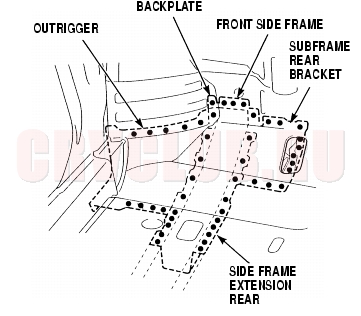
Removal
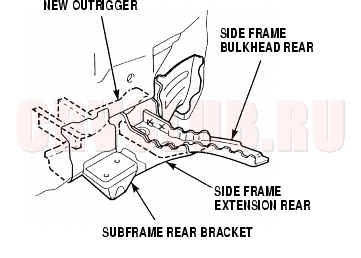
When removing the front side frame, leave the side frame extension rear and side frame bulkhead rear attached to the dashboard lower.
3-11
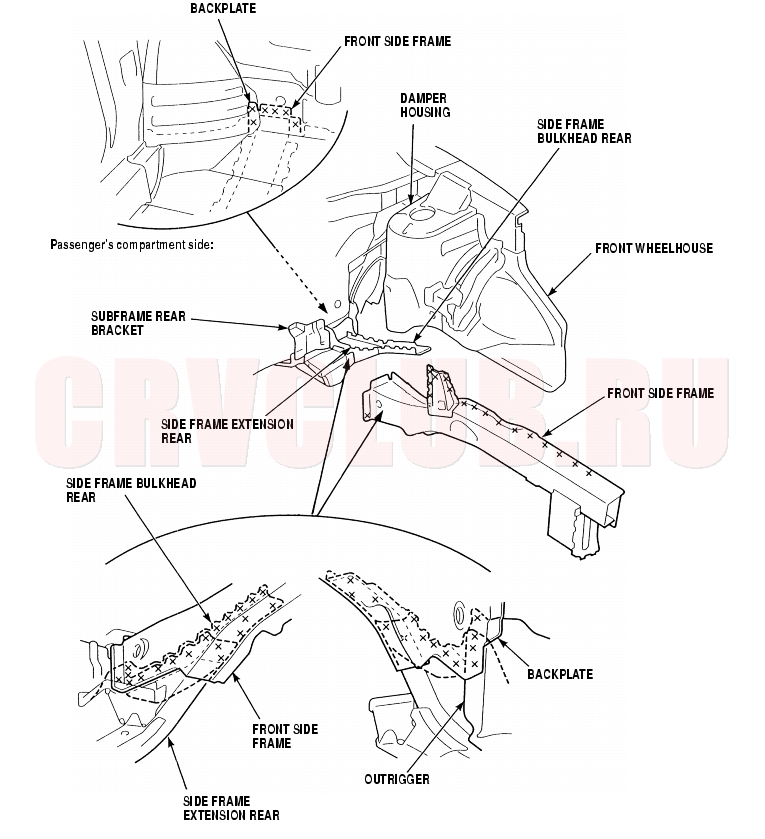
Check the side frame bulkhead rear position, and check for damage. If necessary replace it.
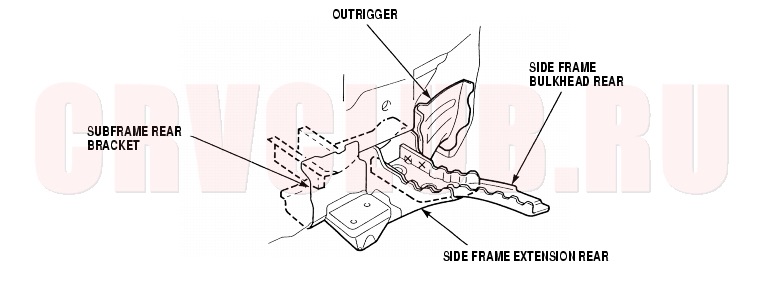
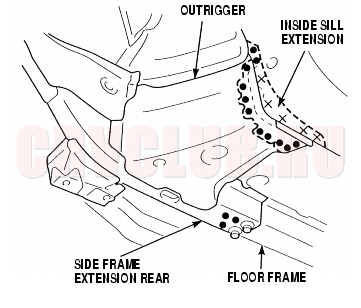
If necessary, replace the side frame extension rear, outrigger, and subframe rear bracket as an assembly. NOTE: When removing the outrigger, leave the inside sill extension attached to the inside sill, if possible.
Front Side Frame / Outrigger (cont'd) 3-12
Installation
- Set the new outrigger and tack weld the new side frame bulkhead rear to the side frame extension rear.
- Set the new front side frame, and front bulkhead into position, and measure the front compartment diagonally.
- Check the body dimensions (see section 4) .
- Tack weld the clamped position.
- Temporarily install the front subframe, and check the front side frame position.
- Temporarily install the hood, front fender, headlight, and front bumper, and check for differences in level and clearance.
- Make sure the body lines flow smoothly.
- Do the main welding.
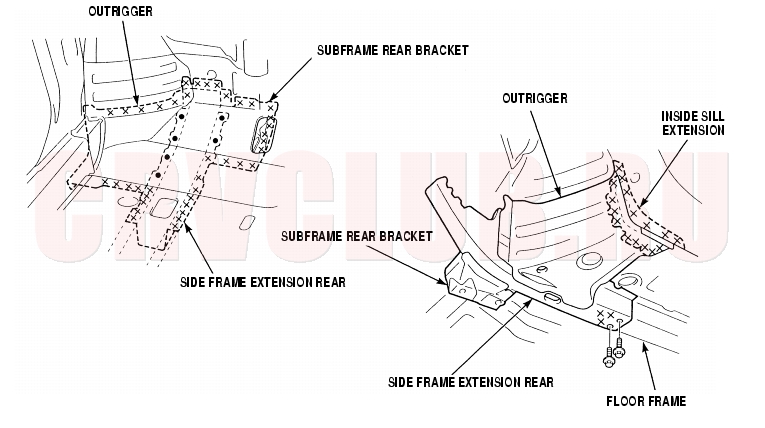
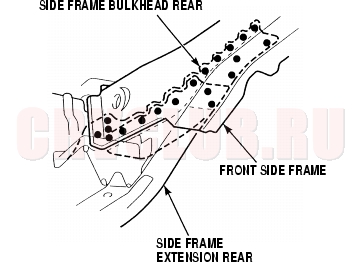
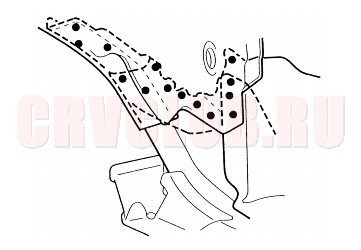
- Plug weld the side frame extension rear, side frame bulkhead rear, and front side frame.
- Plug weld the inside sill extension and floor frame.
- From the passenger compartment, plug weld the dashboard lower and front floor.
3-13
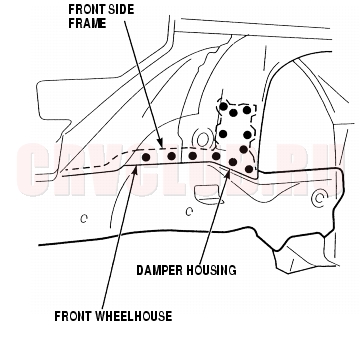
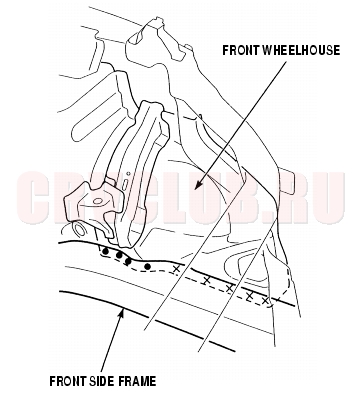
Weld the damper housing, front wheelhouse, and front side frame.
Left side:
Right side:
|
Replacement3-1
Front Side Frame / Outrigger3-9 |
При использовании материалов сайта, ссылка на Клуб Honda CR-V (RUSSIA) обязательна.
2006-2011