Replacement 2-7
|
Preparation of Work2-1
Replacement 2-7 |
Replacement 2-7
Removal
- Decide whether to replace all the affected parts or whether to cut the weld joint parts and replace them.
- NOTE: When cutting the parts off, take special care that you do not damage adjacent parts on the vehicle.
- Setting Condition for Replacement Parts Joint Sections:
- Make sure that you can perform straightening work after welding.
- Make sure that the locations will not be susceptible to distortion caused by other parts.
- Make sure that there are few removable parts and that the location allows for safe welding.
- Make sure that the joints are short and that paint repair can be performed easily.
- Make sure that locations are such that the joints can be finished in a way that will not affect the outward appearance.
- Make sure that the locations do not hinder the removing and attaching of parts.
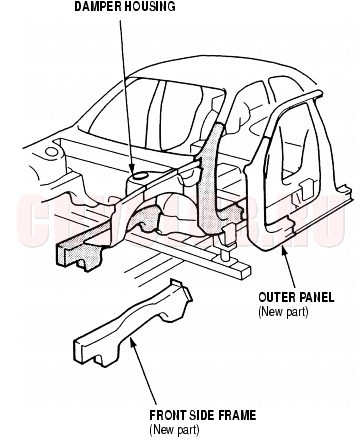
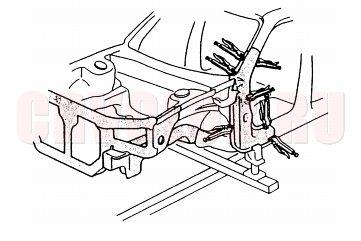
Parts which influence wheel alignment such as damper housing and the side frames must be examined using the frame repair charts.
- Peel off the undercoat.
Be careful not to burn the fittings inside the passenger compartment when heating.
- Remove the damaged parts.
To prevent eye injury, wear goggles or safety glasses whenever sanding, cutting or grinding.
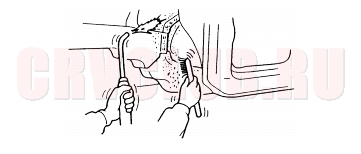
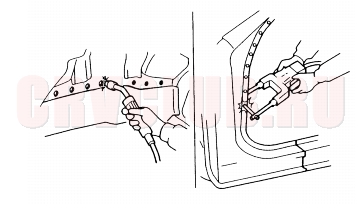
- Center punch around the spot weld imprints on the welded flange and drill holes using the spot cutter.
NOTE: Make a drill hole so that the installation of the repair parts may become easy.
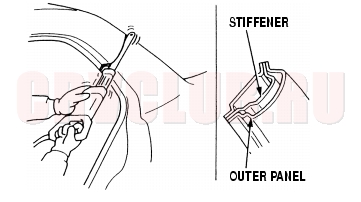
Remove the MIG weld flange with a disc sander. Pry off the welded flange with a chisel.
Cut off the outer panel with an airsaw.
NOTE: Be careful not to cut the inner section.
Replacement (cont'd) 2-8
Installation
- Straighten any damaged parts.
To prevent eye injury and burns when welding, wear an approved welding helmet, gloves and safety shoes.
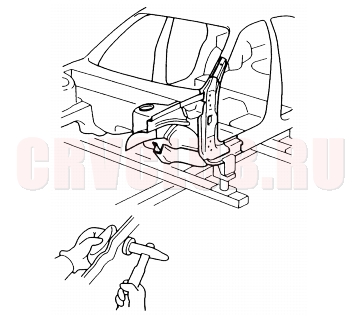
- Fill any holes by MIG welding and even out with a hammer and dolly.
To prevent eye injury, wear goggles or safety glasses whenever sanding, cutting or grinding.
- Level and finish the burns on the welding flanges with a disc sander or belt sander.
- Preparations of new parts.
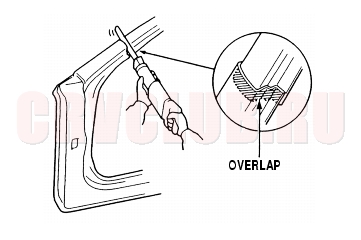
- Cut the new outer panel so it will overlap by 20~30 mm (0.8~1.2 in.) to the panel of the body side.
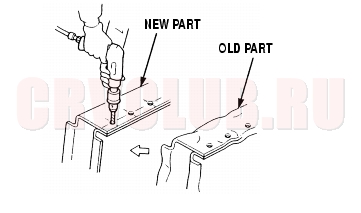
- The part where new parts cannot weld the spot welding make holes for the plug welding.
- Make holes to the size which corresponds to the thickness of the welded plate (see page 2-22) .
- The position and the point by which holes are made, refer to the old parts or Mass Production Body Welding Diagram (see section 3) .
- Apply rust prevention processing on welded surface.
To prevent eye injury, wear goggles of safety glasses whenever sanding.
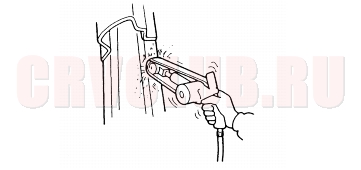
- Remove the undercoat from both sides of the areas to be spot welded with a sander to expose the steel plate.
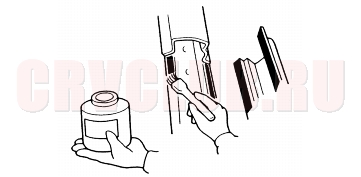
- Apply the spot sealer to the welding surface of the new parts and body side.
- NOTE: Spread the spot sealer coat on the welding surface so that there are no bare areas.
2-9
- Check the tack weld of the new parts.
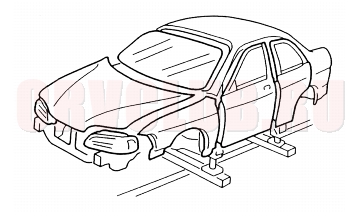
- Clamp the new part and check the position of it using the body dimensional drawings (see section 4) .
- Tack weld the clamped section.
To prevent eye injury and burns when welding, wear an approved welding helmet, gloves and safety shoes.
- Check the alignment of the exterior body parts.
- Temporarily install the exterior body parts, windshield and rear window glass, and check for differences in level and clearances.
- NOTE: Check the fit of the front fender, door and the rear fender and make sure the body lines flow smoothly.
- Main weld the repaired parts.
- Use proper welding methods (see page 2-20 , page 2-21 , page 2-22 , page 2-23 ).
To prevent eye injury and burns when welding, wear an approved welding helmet, gloves and safety shoes.
- Make 20% to 30% more spot welds than there were holes drilled.
- A new welding position should avoid an old position as much as possible.
- NOTE: If there is not room for spot welds, compensate by using MIG welds.
- The electric continuity property of zinc-plated steel plate is different from ordinary steel plate.
When spot welding, increase the current by 10~20%, or increase the resistance welding line.
- Butt weld the front pillar, centre pillar, rear pillar and the wheel arch cut sections of the repaired outer panel.
- NOTE: Attach the patches at the cut sections of the outer panel and plug weld them.
Replacement (cont'd) 2-10
Installation (cont'd)
- Finishing the welded areas.
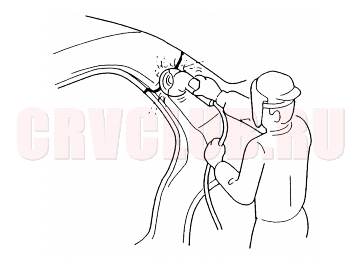
- Level the MIG welded areas with a disc sander.
To prevent eye injury, wear goggles or safety glasses whenever sanding, cutting or grinding
- NOTE: Take care not to grind excessively.
Even out high areas with a hammer. Be careful not to deform them. Smooth out welded door and tailgate areas and window opening flanges with a hammer and dolly. Fill the deformed area and smooth out the welded areas with body filler.
Rust Prevention / Paint
- Applying the sealer. Seal the overlapped areas of the outer panel, and the welded surfaces of the new parts. Seal gaps completely.
- Applying the paint.
- Apply undercoat to the wheelhouse and under-floor.
- Apply the anti-rust agent to the inside of the outer panel and welded areas.
|
Preparation of Work2-1
Replacement 2-7 |
При использовании материалов сайта, ссылка на Клуб Honda CR-V (RUSSIA) обязательна.
2006-2011