Side Sill Outer Panel3-17
|
Replacement3-1
Side Sill Outer Panel3-17 |
Side Sill Outer Panel3-17
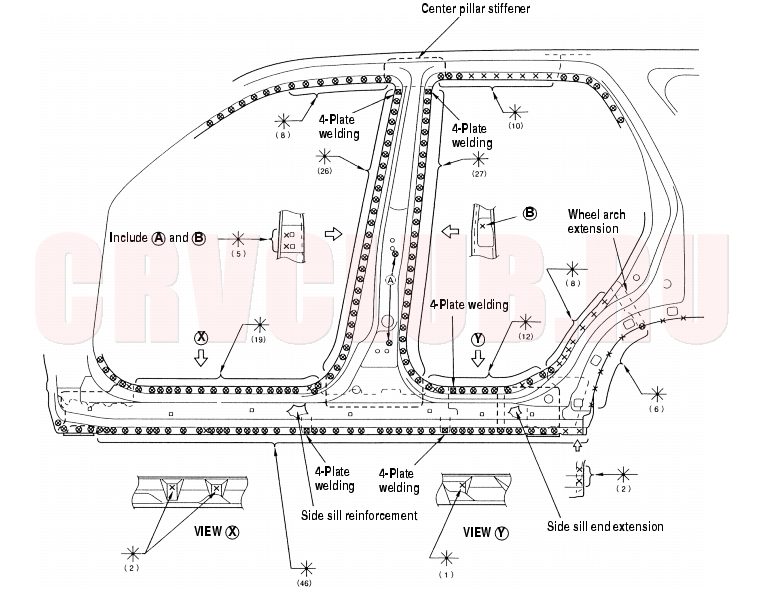
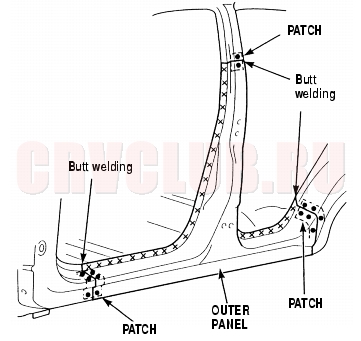
Mass Production Body Welding Diagram
Side Sill Outer Panel (cont'd) 3-18
Removal
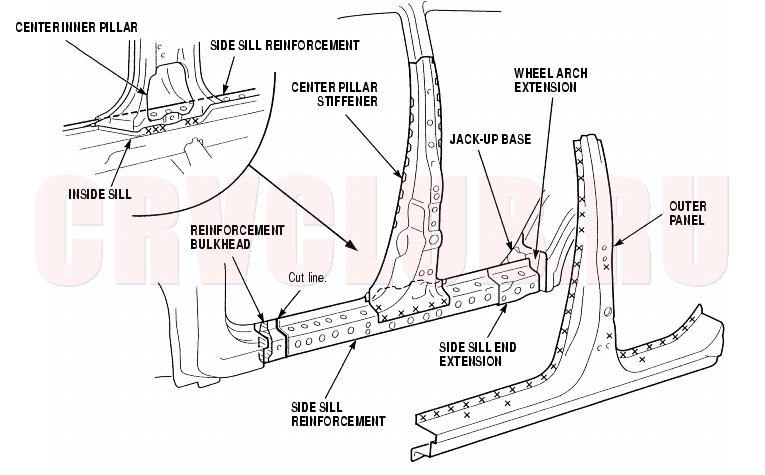
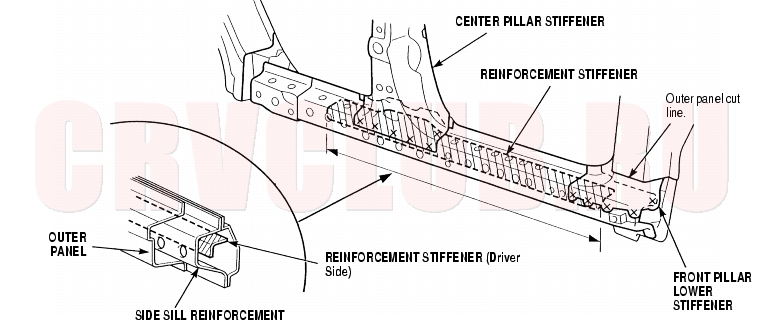
Cut and pry off the side sill outer panel. Check the center pillar stiffener lower and side sill reinforcement position, and check for damage. If necessary, replace the side sill reinforcement. Replace the drivers side sill reinforcement as an assembly because of the way the siffener is attached inside the side sill reinforcement.
3-19
Installation
- Cut and set the new center pillar stiffener and side sill reinforcement into position, and tack weld the clamped position.
- Cut the repair part (outer panel), and set it into position. Clamp the repair part, and check the body dimensions (see section 4) .
- Temporarily install the door and front fender, then check for differences in level and clearance. Make sure the body lines flow smoothly.
- Remove the repair part, and weld the center pillar stiffener, side sill reinforcement.
When replacing the side sill reinforcement, cut the new side sill reinforcement so it overlaps the body side reinforcement by 20 mm (0.8 in.), and fillet weld it.
- Clamp the repair part, and recheck the clearance and alignment of the door and front fender.
- Check the operation of the door.
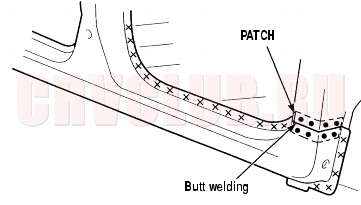
- Do the main welding. Make sure to attach the patch at the cut section of the front pillar, side sill, center pillar, and wheel arch, and plug weld them.
|
Replacement3-1
Side Sill Outer Panel3-17 |
При использовании материалов сайта, ссылка на Клуб Honda CR-V (RUSSIA) обязательна.
2006-2011