Differential Reassembly15-21
|
Rear Differential15-1
Differential Reassembly15-21 |
Differential Reassembly15-21
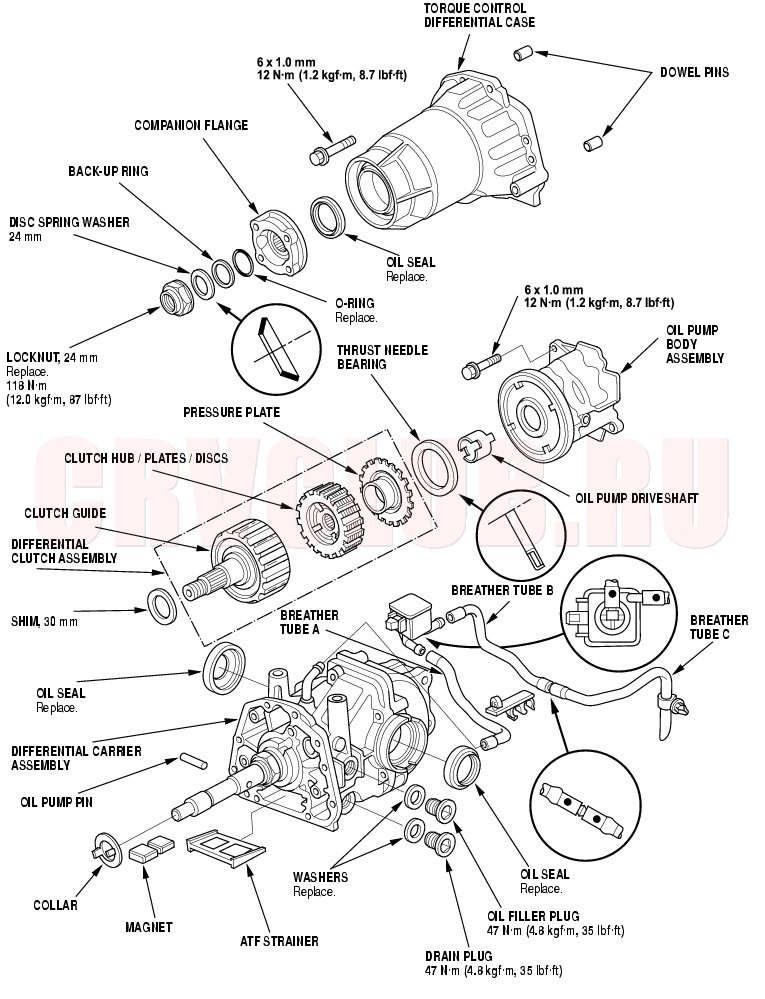
Exploded View
Differential Reassembly (cont'd)15-22
Special Tools Required
Companion Flange Holder 07PAB-0020000
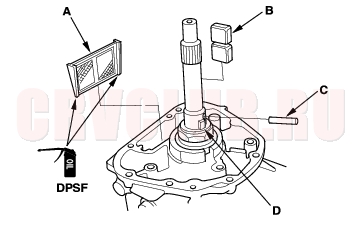
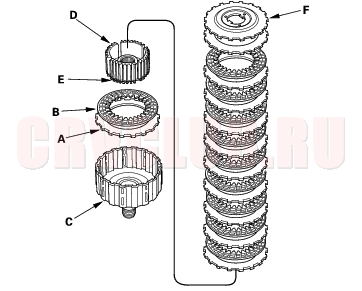
- Apply DPSF to the rubber of the ATF strainer (A), then install the ATF strainer, the magnet (B), and the oil pump pin (C), and the collar (D) to the differential carrier assembly.
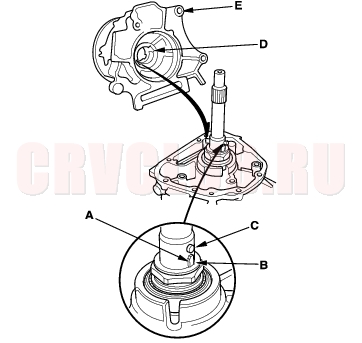
- Align the tabs (A) of the collar (B) with the oil pump pin (C). Align the grooves (D) of the rear oil pump with the oil pump pin and collar tabs, then install the oil pump body assembly (E) to the differential carrier assembly.
- Tighten the oil pump body assembly mounting bolts.
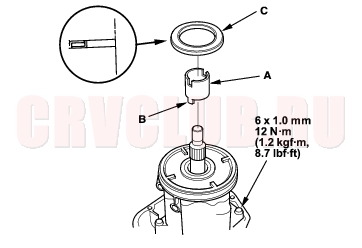
- Install the oil pump driveshaft (A) by aligning the projection (B) of the oil pump driveshaft with the groove of the front oil pump in the oil pump body assembly.
- Install the thrust needle bearing (C).
- If necessary, reassemble the differential clutch, and note these items:
- Install on metal clutch plate (A) and one fiber clutch disc (B) in the clutch guide (C), then install the clutch hub with snap ring (D) into the clutch guide.
- Make sure the splines of the clutch hub and fiber clutch disc line up below the snap ring (E).
- Install the remaining metal clutch plates and fiber clutch discs alternately until you installed a total of eleven plates and ten discs, then install the pressure plate (F).
15-23
- Install the differential clutch assembly (A) by aligning the tabs of the pressure plate (B) with the grooves in the oil pump driveshaft (C).
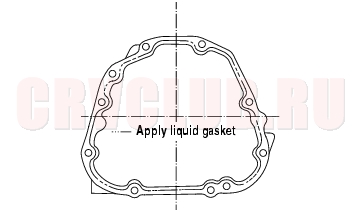
- Remove the dirt and oil from the sealing surfaces. Apply liquid gasket (P/N08C70-K0234M) to the sealing surface. Be sure to seal the entire circumference of the bolt holes to prevent oil leakage.
- NOTE:
- If 5 minutes have passed after applying liquid gasket, reapply it and assemble the housings.
- Allow it to cure at least 20 minutes after assembly before filling the differential with oil.
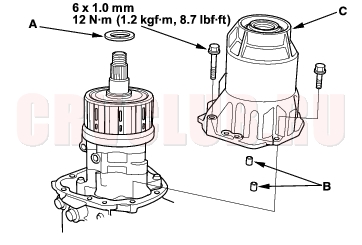
- Install the 30 mm shim (A), the 6 x 1.0 mm dowel pins (B), and the torque control differential case (C). Torque the eight mounting bolts in a crisscross pattern in several steps.
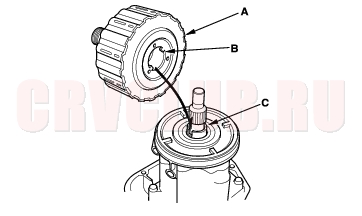
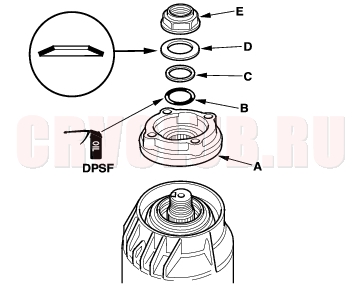
- Install the companion flange (A), O-ring (B), back-up ring (C), disc spring washer (D), and the locknut (E).
- NOTE: Apply DPSF to the O-ring.
Differential Reassembly (cont'd)15-24
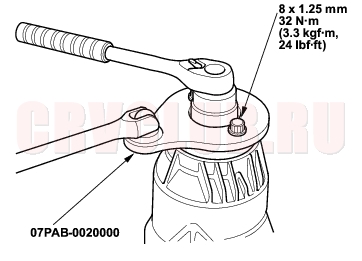
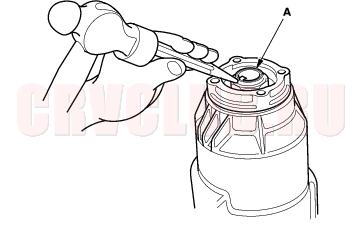
- Install the special tools to the companion flange, then tighten the new locknut to specified torque.
TORQUE: 118 N·m (12.0 kgf·m, 87 lbf·ft)
|
Rear Differential15-1
Differential Reassembly15-21 |