Rear Floor / Rear Floor Cross-member3-32
|
Replacement3-1
Rear Floor / Rear Floor Cross-member3-32 |
Rear Floor / Rear Floor Cross-member3-32
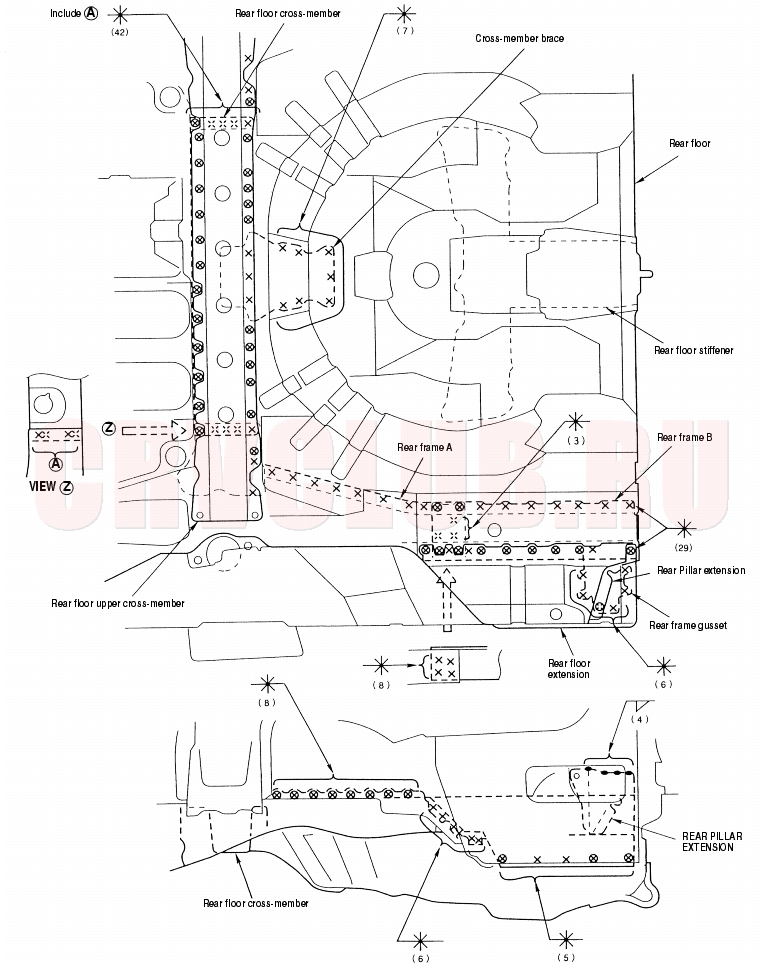
Mass Production Body Welding Diagram
3-33
Removal
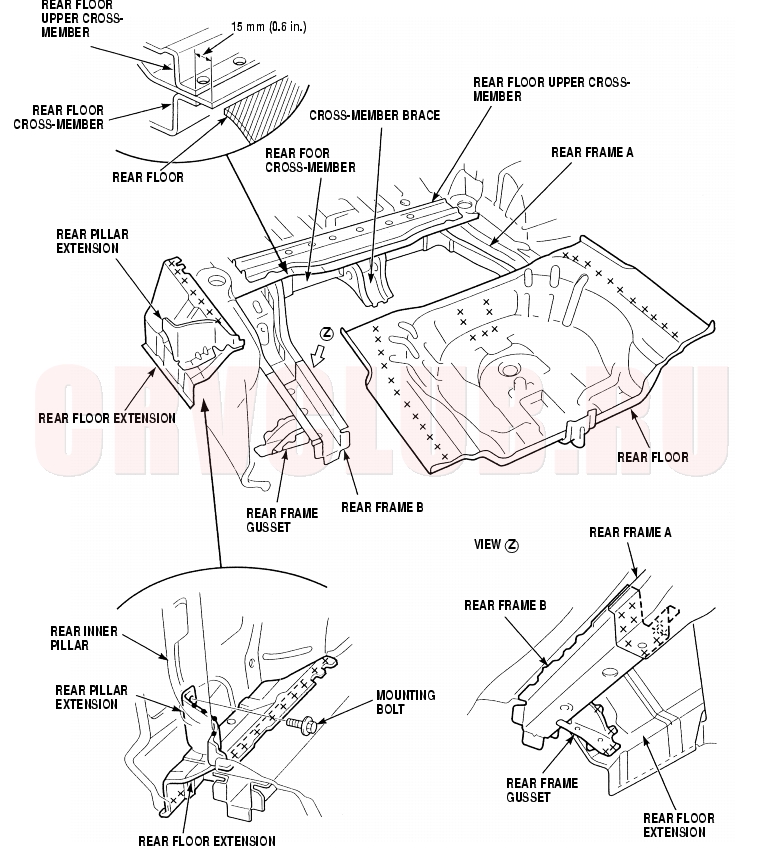
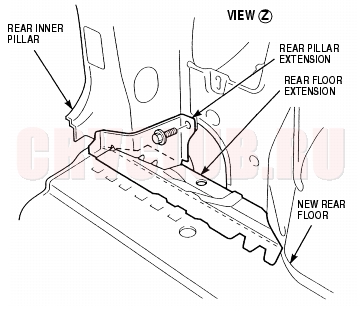
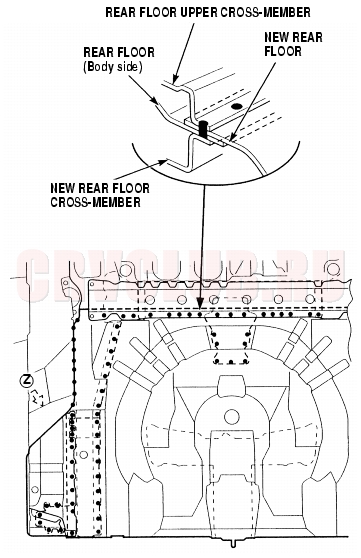
Remove the rear floor extension, and cut the rear floor 15 mm (0.6 in.) from the welded flange for the rear floor upper cross-member. If necessary, replace the rear frame B. Check the rear floor cross-member position, and check for damage. If necessary replace it.
Rear Floor / Rear Floor Cross-member (cont'd)3-34
Installation
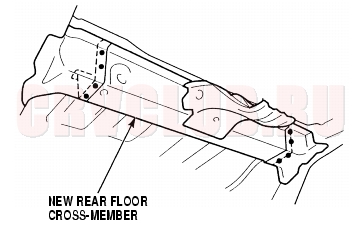
- Set the new rear floor cross-member and rear frame B, into position. Check the body dimensions (see section 4) .
- Tack weld the rear cross-member and rear frame B.
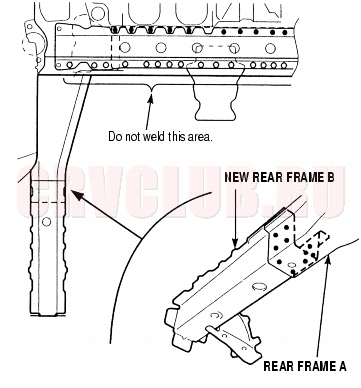
- Check the rear floor cross-member, rear frame A and B in its correct position with rear suspension, then weld them into place.
- Set the new rear floor into position, and align it with the body.
- Cut the new rear floor so it overlaps the body side floor by about 40 mm (1.6 in.).
- Insert the new rear floor between the rear floor upper cross-member and rear floor (body side).
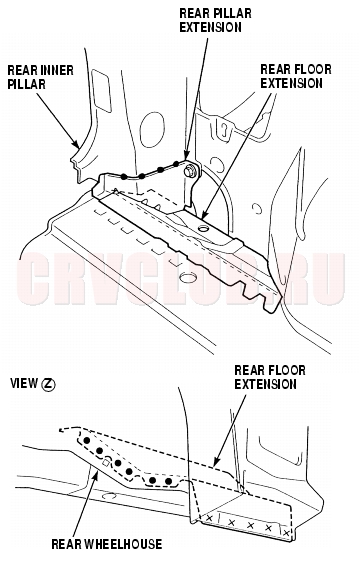
- Install the rear wheelhouse gusset, and check the position.
- Install the new rear floor extension.
3-35
- Clamp the rear panel and the rear pillar gutter together, then check the body dimensions (see section 4) .
- Do the main welding.
|
Replacement3-1
Rear Floor / Rear Floor Cross-member3-32 |
При использовании материалов сайта, ссылка на Клуб Honda CR-V (RUSSIA) обязательна.
2006-2011