Rear Panel3-29
|
Replacement3-1
Rear Panel3-29 |
Rear Panel3-29
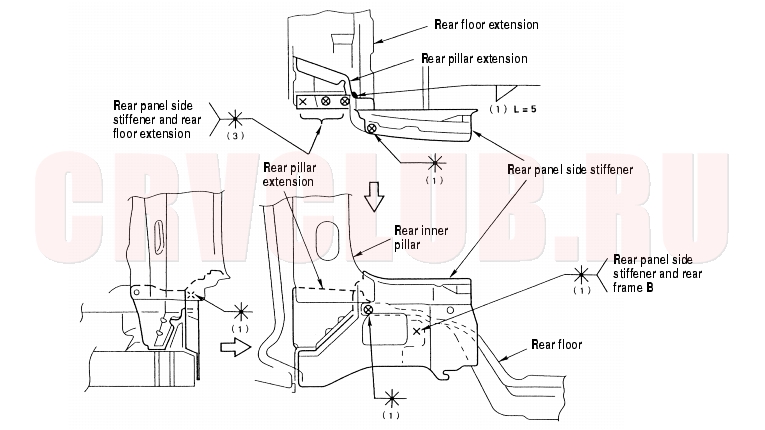
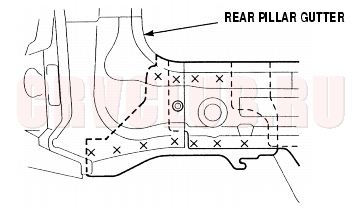
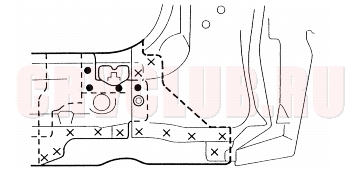
Mass Production Body Welding Diagram
Rear Pillar Gutter and Rear Panel removed:
Rear Panel (cont'd)3-30
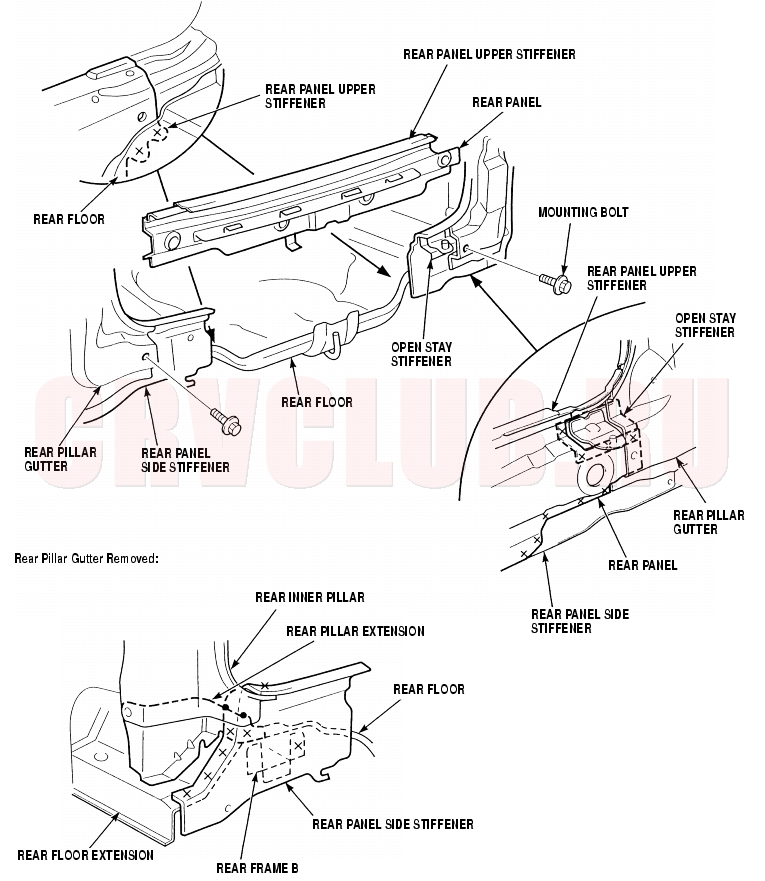
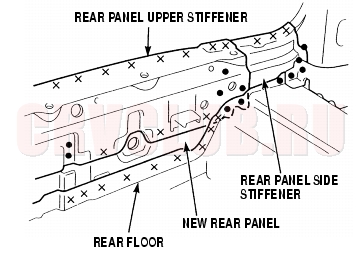
Removal
Remove the mounting bolts, and cut off the rear panel upper stiffener and rear panel. Check the rear panel side stiffener position, and check for damage. If necessary, cut and remove the rear pillar gutter and rear pillar lower stiffener, then replace the rear panel side stiffener.
3-31
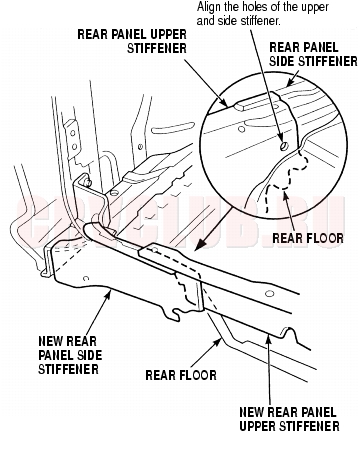
Installation
- Check the position of the rear inner pillar, by installing the new rear panel upper stiffener and rear panel side stiffener into place.
- Check the body dimensions (see section 4) .
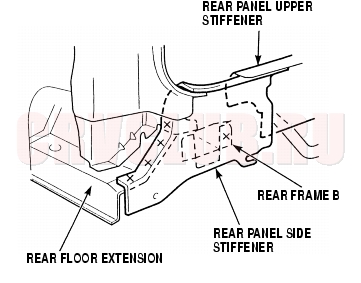
- Weld the rear panel side stiffener, rear floor extension and rear frame B, and tack weld the rear panel upper stiffener.
- Set the new rear panel and new rear pillar gutter into place, then check the body dimensions (see section 4) .
- Tack weld the new parts.
- Temporarily install the tailgate, taillight, rear bumper, and check for differences in level and clearance. Check the operation of the tailgate.
- Do the main welding.
- Weld the rear pillar gutter (see page 3-28) .
Left side:
Right side:
|
Replacement3-1
Rear Panel3-29 |
При использовании материалов сайта, ссылка на Клуб Honda CR-V (RUSSIA) обязательна.
2006-2011