Rear Driveshafts Disassembly16-25
|
Driveline/Axle16-1
Rear Driveshafts Disassembly16-25 |
Rear Driveshafts Disassembly16-25
Due to the amount of work required to replace one damaged boot, it is best to replace both boots at the same time. These instructions are for the inboard joint. The same procedure applies to the outboard joint.
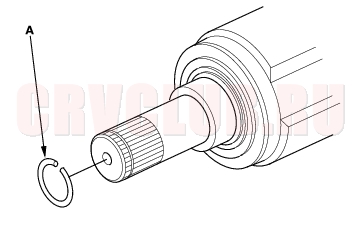
- Remove the set ring (A) from the inboard joint.
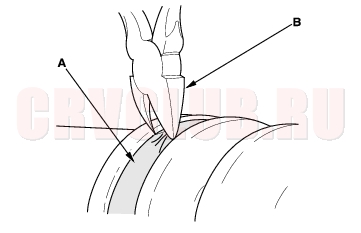
- Remove the boot bands. Be careful not to damage the boot and dynamic damper.
- If the boot band is a welded type (A), cut the boot band (B).
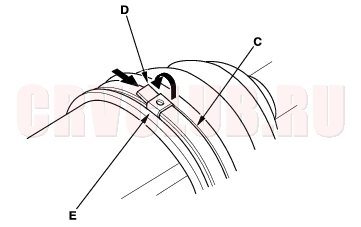
- If the boot band is a double loop type (C), lift up the band bend (D), and push it into the clip (E).
- If the boot band is a low profile type (F), pinch the boot band using a commercially available boot band pincers (G).
Rear Driveshafts Disassembly (cont'd)16-26
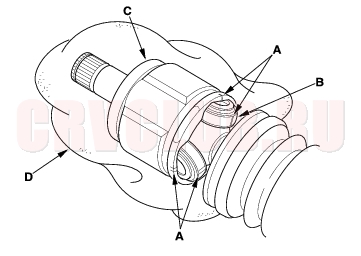
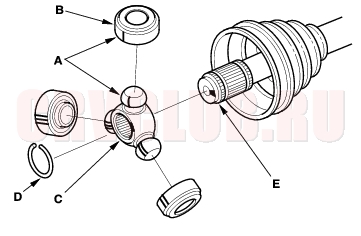
- Make a mark (A) on each roller (B) and inboard joint (C) to identify the locations of rollers and grooves in the inboard joint. Then remove the inboard joint on the shop towel (D). Be careful not to drop the rollers when separating them from the inboard joint.
- Make a mark (A) on the rollers (B) and spider (C) to identify the locations of the rollers on the spider, them remove the rollers.
- Remove the circlip (D).
- Mark the spider (C) and driveshaft (E) to identify the position of the spider on the shaft.
- Remove the spider (C).
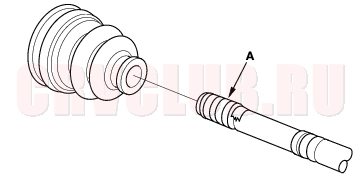
- Wrap the splines on the driveshaft with vinyl tape (A) to prevent damage to the boot.
- Remove the inboard boot. Be careful not to damage the boot.
- Remove the vinyl tape.
|
Driveline/Axle16-1
Rear Driveshafts Disassembly16-25 |