Rear Window Defogger 22A-122
|
Body Electrical22A-1
Rear Window Defogger 22A-122 |
Rear Window Defogger 22A-122
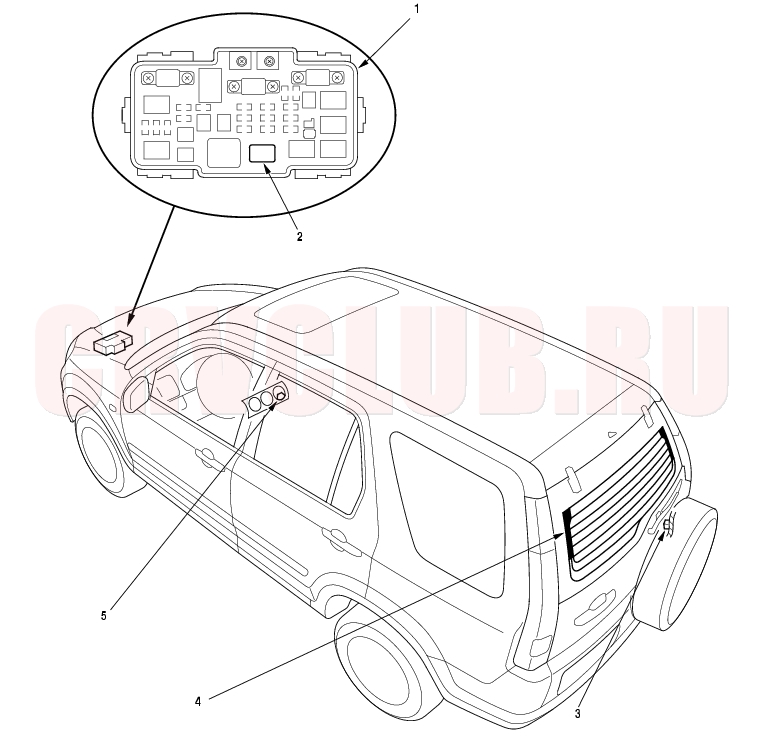
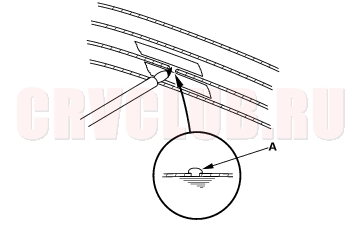
Component Location Index
NOTE: LHD type is shown, RHD type is similar.
Test, page 22A-62 Capacity Test, page 22A-136 Function Test, page 22A-135 ; Defogger Wire Repair, page 22A-135
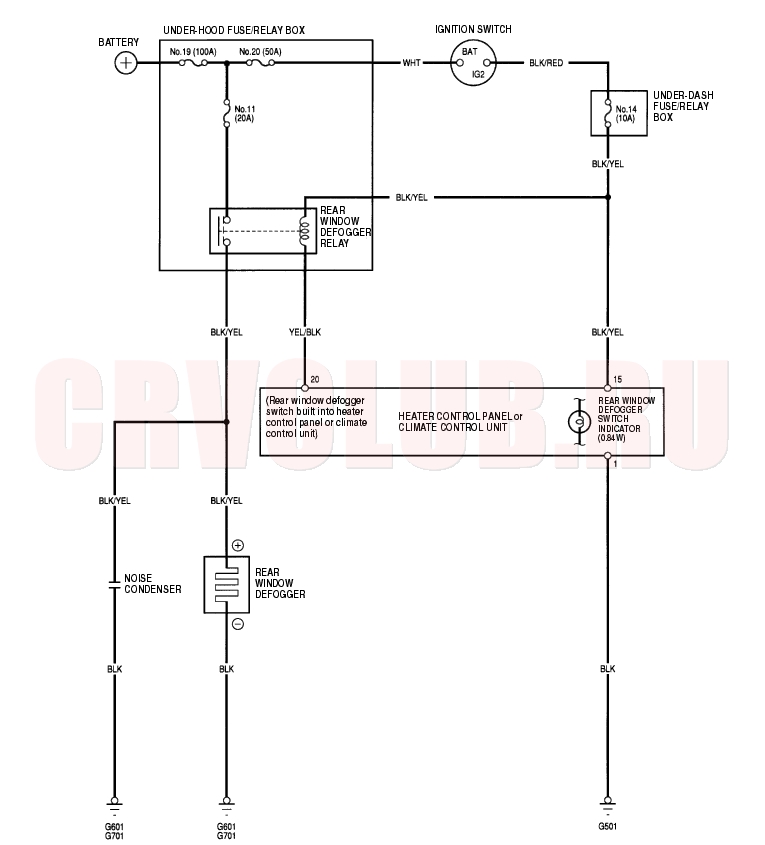
Circuit Diagram 22A-123
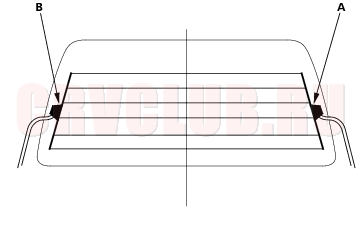
Function Test 22A-124
Be careful not to scratch or damage the defogger wires with the tester probe. Before testing, check the No. 11 (20A) fuse in the under-hood fuse/relay box and No. 14 (10A) fuse in the under-dash fuse/relay box.
- Check for voltage between the positive terminal (A) on the right side of the glass and body ground with the ignition switch and defogger switch ON.
- There should be battery voltage.
- If there is no voltage, check for:
- faulty defogger relay.
- an open in the BLK/RED, BLK/YEL, or YEL/BLK wire.
- faulty the heater control panel or climate control unit.
- If there is battery voltage, go to step 2.
- Check for voltage between the positive terminal (A) and the negative terminal (B).
- If there is no voltage, check for:
- an open in the BLK wire.
- Poor ground (G601 or G701).
- Touch the voltmeter positive probe to the halfway point of each defogger wire, and the negative probe to the negative terminal.
- There should be about 6 V with the ignition switch and the defogger switch ON.
- If the voltage is as specified, the defogger wire is OK.
- If the voltage is not as specified, repair the defogger wire.
- If there is battery voltage, there is a break in the negative half of the grid.
- If it there is 0 V, there is a break in the positive half of the grid.
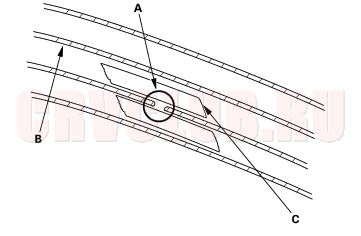
Defogger Wire Repair 22A-124
NOTE: To make an effective repair, the broken section must be no longer than 1 inch.
- Lightly rub the area around the broken section (A) with fine steel wool, then clean it with alcohol.
- Carefully mask above and below the broken portion of the defogger wire (B) with transparent tape (C).
- Mix the silver conductive paint thoroughly. Using a small brush, apply a heavy coat of the paint (commercially available defogger grid repair material) extending about 1/8'' on both sides of the break. Allow 30 minutes to dry. Mix the paint before use.
- Check for continuity in the repaired wire.
- Apply a second coat of paint in the same way. Let it dry 3 hours before removing the tape.
Noise Condenser Capacity Test 22A-125
- Remove the right rear side trim panel (see page 20-77) .
- Disconnect the 2P connector (A) from the noise condenser.
Noise Condenser capacity: 0.47 ± 0.09 microfarads
|
Body Electrical22A-1
Rear Window Defogger 22A-122 |