Stereo Sound System 22A-116
|
Body Electrical22A-1
Stereo Sound System 22A-116 |
Stereo Sound System 22A-116
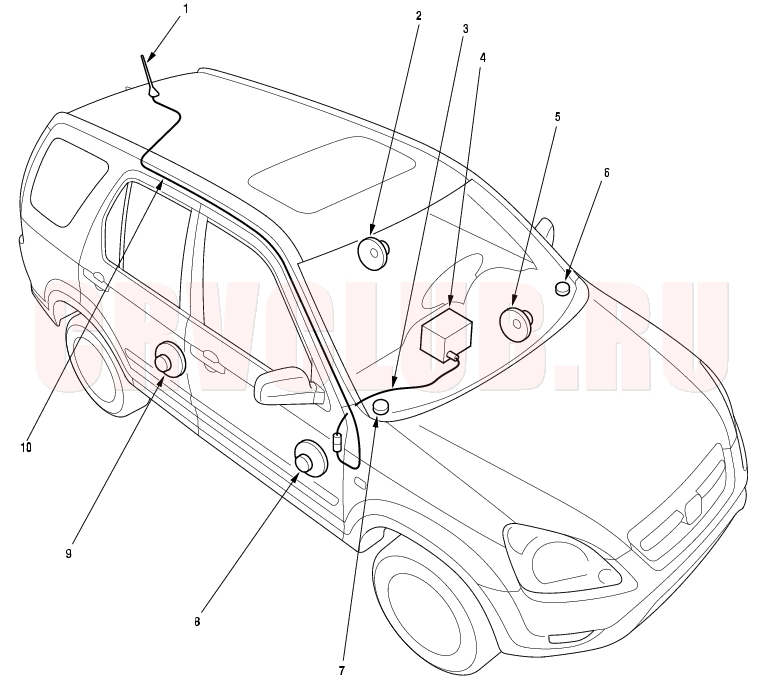
Component Location Index
NOTE: LHD type is shown, RHD type is similar.
Replacement, page 22A-132 Replacement, page 22A-130 Removal, page 22A-128 ; Connector Replacement, page 22A-129 Replacement, page 22A-130 Replacement, page 22A-131 Replacement, page 22A-131 Replacement, page 22A-130 Replacement, page 22A-130
Circuit Diagram 22A-117
Audio Unit Removal/Installation 22A-118
Put on gloves to protect your hands. Take care not to scratch the dashboard and related parts.
- Make sure you have the anti-theft code for the radio, then write down the frequencies for the radio's preset buttons.
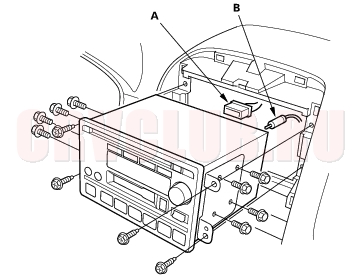
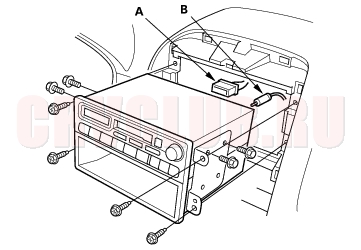
- Remove the dashboard center panel (see page 20-89) .
- Remove the fore mounting bolts, then remove the audio unit.
Type 1:
Type 2:
- Disconnect the connector (A) and the antenna lead (B).
- Install the audio unit in the reverse order of removal, and note these items:
- Make sure the audio unit connector is plugged in properly, and the antenna lead is connected properly.
- Enter the anti-theft code for the radio, then enter the customer's radio station presets.
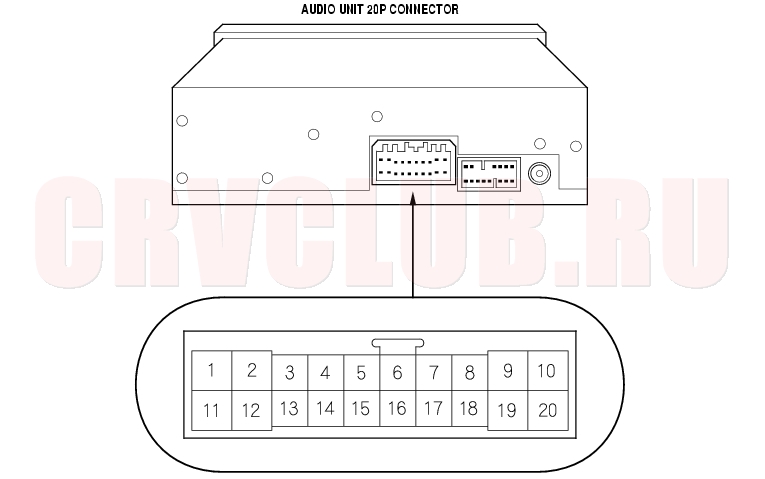
Audio Unit Connector Replacement 22A-119
Speaker Replacement 22A-120
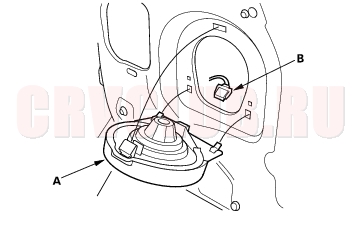
Door Speaker:
- Remove the door panel (see page 20-9) .
- Push down on the clip, then pull the top of the speaker (A) straight out just enough to release the upper clip. If you pull the speaker out too far, you will damage the lower clips (C). Then lift the speaker straight up to release the lower clips.
- Disconnect the 2P connector (B), and remove the speaker.
- Install the speaker in the reverse order of removal.
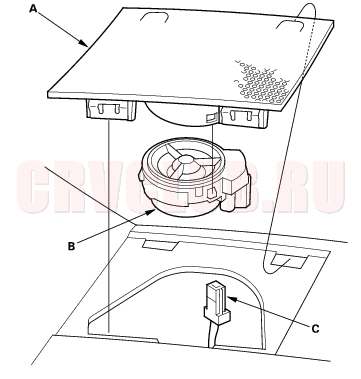
Tweeter:
- Remove the tweeter speaker grille (A) and tweeter (B) as an assembly.
- Disconnect the 2P connector (C) from the tweeter.
- Remove the tweeter speaker grille from the tweeter.
- Install the tweeter in the reverse order of removal.
Roof Antenna Replacement 22A-121
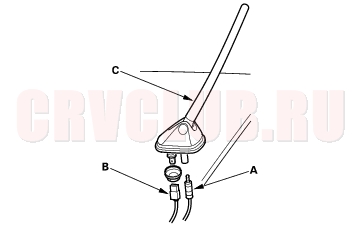
- Remove the rear part of headliner (see page 20-81) .
- Disconnect the antenna lead connector (A) and 1P connector (B) from the roof antenna (C).
- Remove the mounting nut and the antenna.
|
Body Electrical22A-1
Stereo Sound System 22A-116 |