Interior Trim20-75
|
Body20-1
Interior Trim20-75 |
Interior Trim20-75
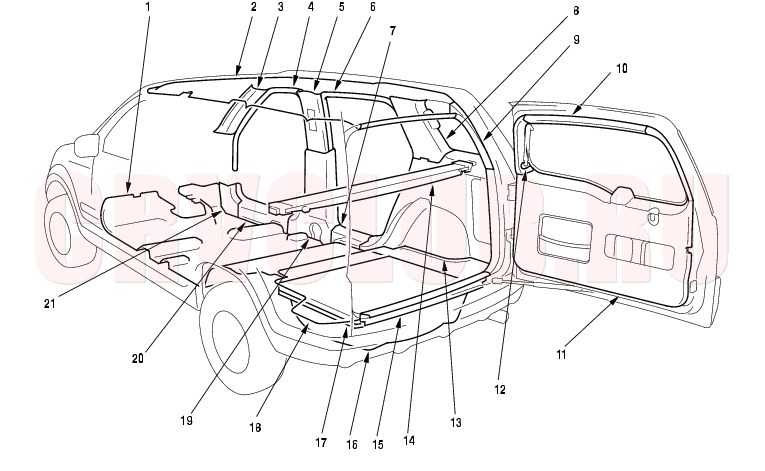
Component Location Index
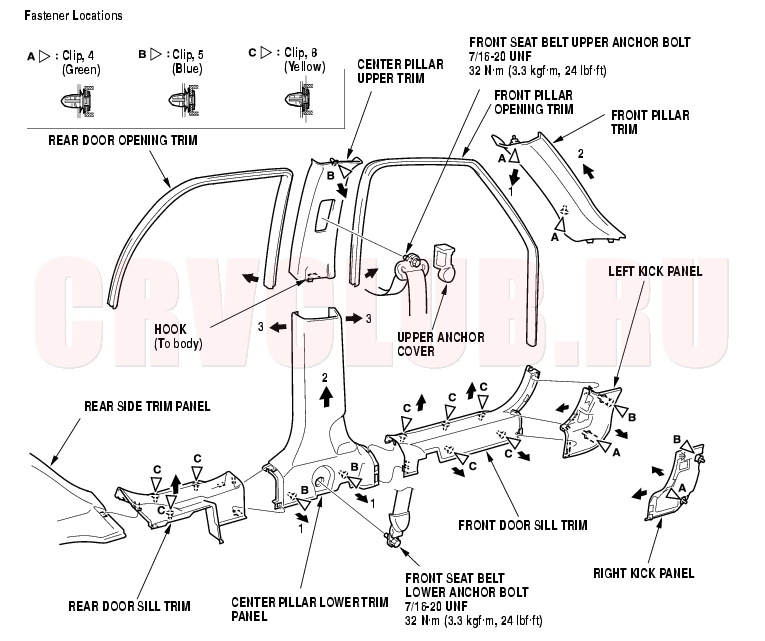
Trim Removal/Installation - Door Area20-76
Put on gloves to protect your hands. When prying with a flat-tip screwdriver, wrap it with protective tape to prevent damage. Take care not to bend or scratch the trim and panels. Install the trim in the reverse order of removal, and note these items:
Replace any damaged clips. Apply liquid thread lock to the front seat belt upper anchor bolt before installation. Before installing the anchor bolts, make sure there are no twists or kinks in the belts.
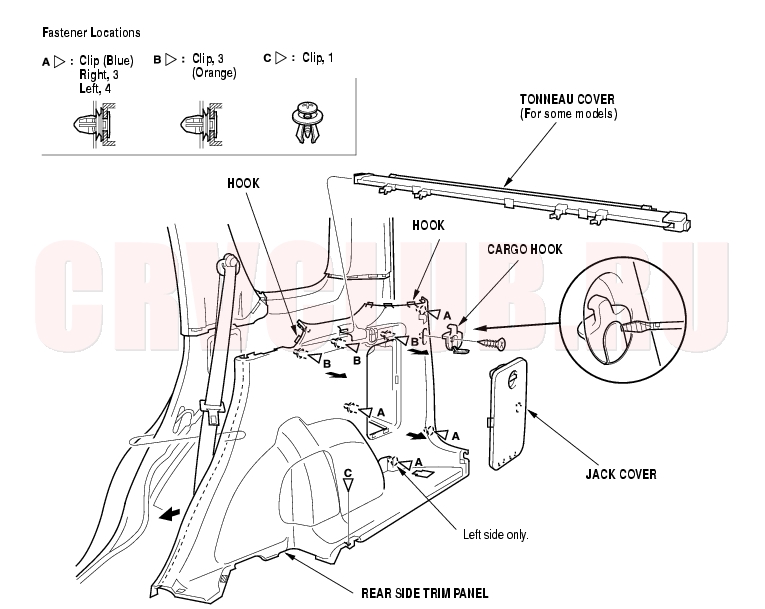
Trim Removal/Installation - Rear Side Area20-77
Put on gloves to protect your hands. When prying with a flat-tip screwdriver, wrap it with protective tape to prevent damage. Take care not to bend or scratch the trim and panels. Remove these items, then remove the trim as shown:
Rear door sill trim (see page 20-76) Trunk floor mat, cargo floor lid, rear floor bucket, tie-down hooks, rear trim panel (see page 20-79) Accessory power socket (from the left rear side trim panel) (see page 22A-239) Install the trim in the reverse order of removal, and note these items:
Replace any damaged clips. Make sure there are no pinches in the belt.
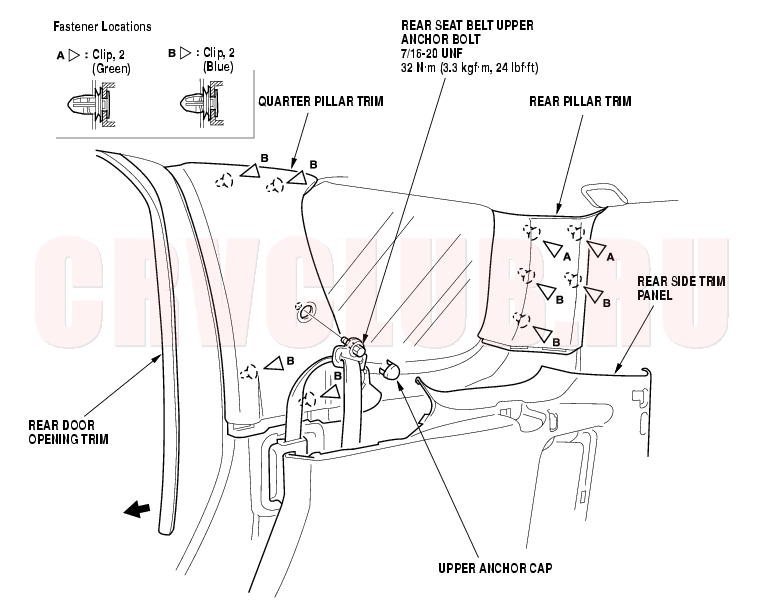
Trim Removal/Installation - Rear Side Pillar Area20-78
Put on gloves to protect your hands. When prying with a flat-tip screwdriver, wrap it with protective tape to prevent damage. Take care not to bend or scratch the trim and panels. Remove the trim as shown. Remove the upper portion of the rear side trim panel as necessary (see page 20-77) .
Install the trim in the reverse order of removal, and note these items:
Replace any damaged clips. When installing the rear side trim panel, make sure there are no pinches in the belt. Before installing the anchor bolt, make sure there are no twists or kinks in the belt.
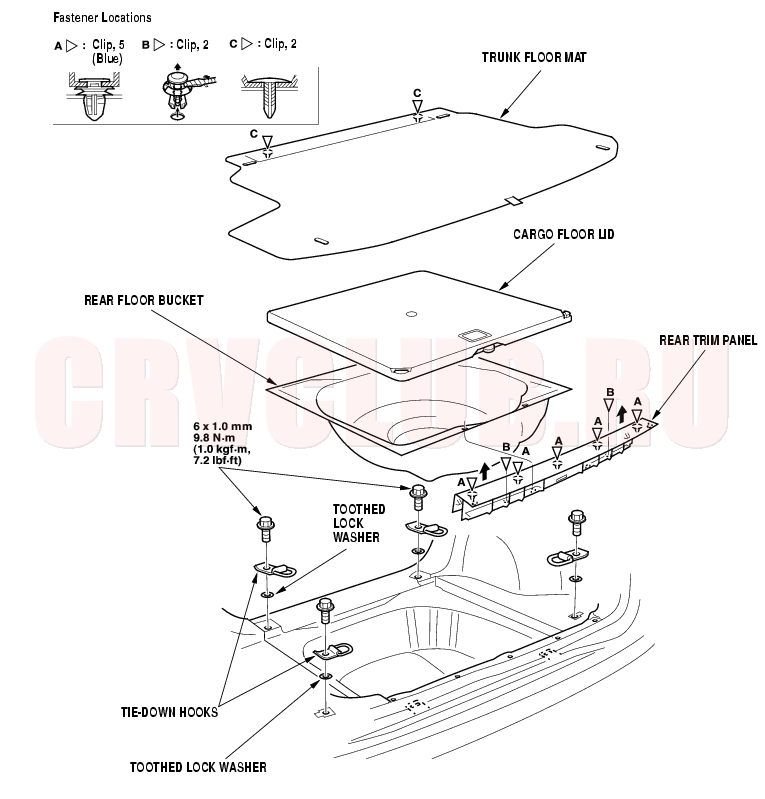
Trim Removal/Installation - Cargo Area20-79
Put on gloves to protect your hands. When prying with a flat-tip screwdriver, wrap it with protective tape to prevent damage. Take care not to bend or scratch the trim and panels. Install the trim in the reverse order of removal, and replace any damaged clips.
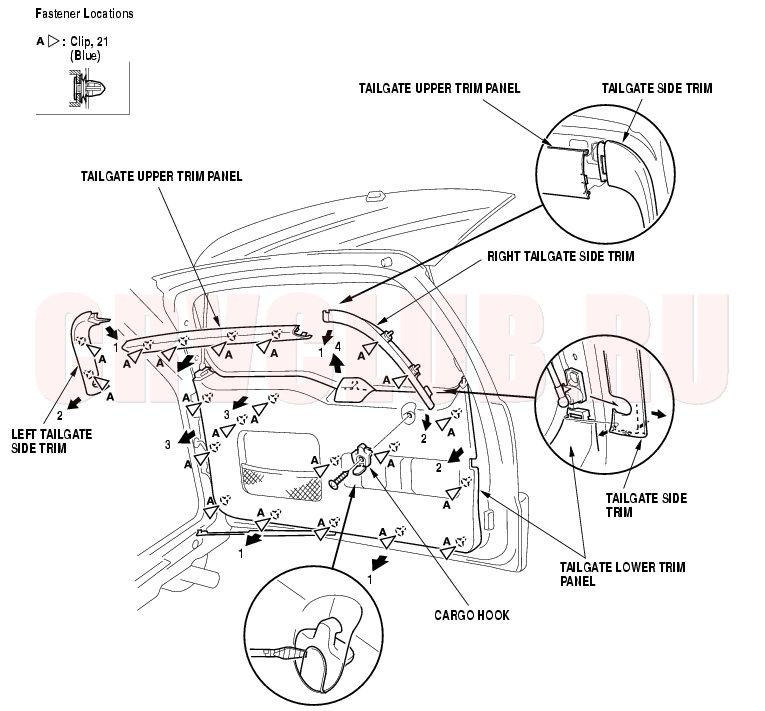
Trim Removal/Installation - Tailgate Area20-80
Put on gloves to protect your hands. When prying with a flat-tip screwdriver, wrap it with protective tape to prevent damage. Take care not to bend or scratch the trim and panels. Install the trim in the reverse order of removal, and replace any damaged clips.
Headliner Removal/Installation20-81
When prying with a flat-tip screwdriver, wrap it with protective tape to prevent damage. Take care not to bend and scratch the headliner. Be careful not to damage the dashboard and other interior trim.
- Remove these items:
- Front pillar trim, both sides (see page 20-76)
- Center pillar upper trim, one side (see page 20-76)
- Quarter pillar trim, one side (see page 20-78)
- Rear pillar trim, both sides (see page 20-78)
- Spotlights, for some models (see page 22A-108)
- Ceiling light (see page 22A-109)
- Cargo room light (see page 22A-109)
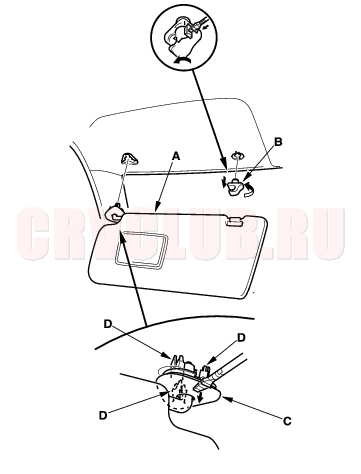
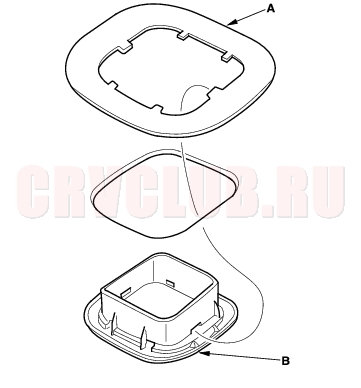
- From both sides, remove the sunvisor (A) and holder (B).
- Using a flat-tip screwdriver, pry the cap (C).
- Pull the clip portions (D) of the cap down.
- Remove the sunvisor from the body and holder.
- Using a flat-tip screwdriver, push the hook, and turn the holder 90°, then pull it out.
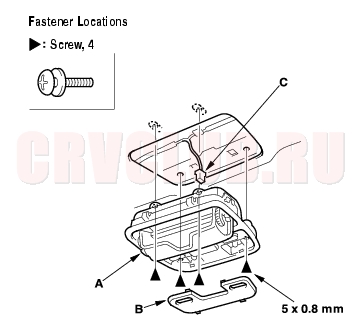
- If equipped, remove the roof console (A).
- Remove the lens (B).
- Remove the screws.
- Pull out the roof console, and disconnect the front individual map light connector (C).
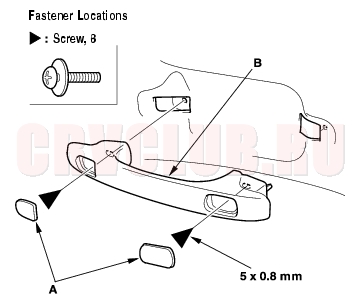
- Remove the caps (A), and remove the screws, then remove the grab handles (B) (driver's and each passenger's).
Headliner Removal/Installation (cont'd)20-82
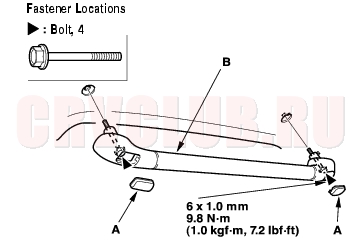
- If equipped, remove the caps (A), and remove the bolts, then remove the inner roof rails (B) from both sides.
- If equipped, remove the cap (A) from the center seat belt retractor cover (B).
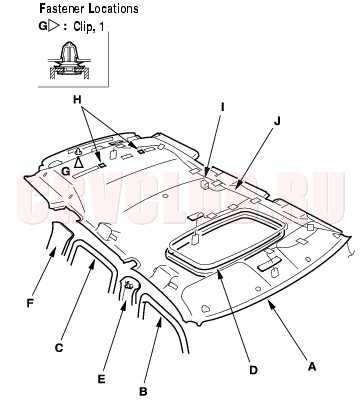
- With the help of an assistant, remove the headliner (A). LHD is shown, RHD is similar.
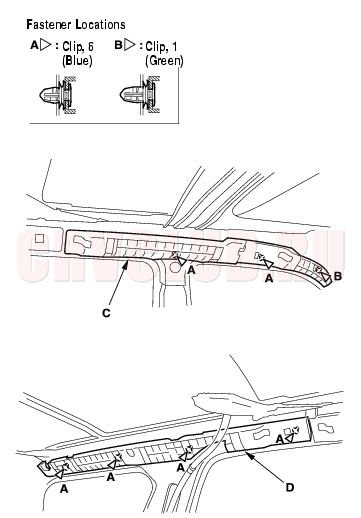
- Remove the remaining front door opening trim (B) and rear door opening trim (C) from each roof portion.
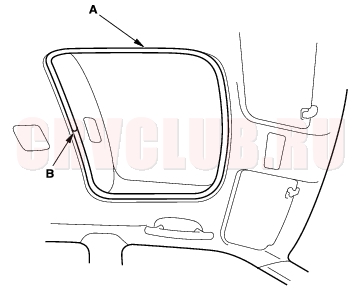
- With sunroof: Remove the roof trim (D).
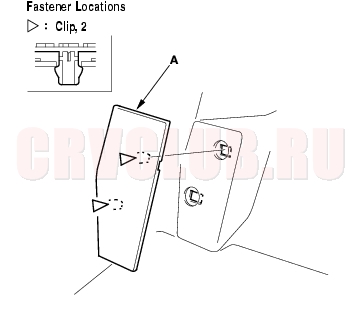
- Remove the upper portion of the remaining center pillar upper trim (E) and quarter pillar trim (F). Take care not to damage the trim.
- Detach the clip (G), and release the fasteners (H) by pulling the rear portion of the headliner down. Take care not to damage the headliner.
- Lower the headliner, and remove it from the remaining trim, and disconnect the sunroof connector (I) (with sunroof). Take care not to damage the interior wire harness (J).
20-83
- With the help of an assistant, remove the cushion tape, then remove the interior wire harness (A) from the headliner (B). Take care not to damage the headliner and interior wire harness.
- Remove the headliner through the tailgate opening.
- Take care not to damage the headliner.
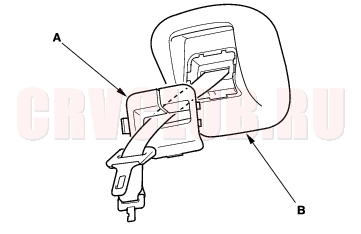
- If equipped with the anchors, remove the anchor cover bracket (A), then remove the anchor cover (B) from the headliner.
- If equipped with a center seat belt retractor, remove the speed nuts (A), and remove the cushion tape (B), then remove the retractor cover bracket (C) and retractor cover (D) from the headliner.
Headliner Removal/Installation (cont'd)20-84
- Using a clip remover, detach the clips (A, B), then remove the front roof side pad (C) and rear roof side pad (D).
- Install the headliner in the reverse order of removal, and note these items:
- When reinstalling the headliner through the tailgate opening, be careful not to fold or bend it. Also, be careful not to scratch the body.
- Replace any damaged clips, and replace the cushion tape.
- Check that both sides of the headliner are securely attached to the trim.
- With sunroof: When reinstalling the roof trim (A), install the joint (B) as shown.
Carpet Replacement20-85
SRS components are located in this area. Review the SRS component locations (see page 23-14) , and the precautions and procedures (see page 23-16) in the SRS section before performing repairs or service.
Put on gloves to protect your hands. Take care not to damage, wrinkle or twist the carpet. Be careful not to damage the dashboard or other interior trim pieces.
- Remove these items:
- Front seats, both sides (see page 20-103)
- Rear seats, both sides (see page 20-114)
- Center pillar lower trim panel, both sides (see page 20-76)
- Dashboard center lower cover, A/T (see page 20-91) , M/T (see page 20-93)
- RHD: Detach the clips, then remove the footrest (A).
- Remove the carpet (A).
- Remove the clips (B).
- Detach the clips (C), then pull back the trunk floor mat (D).
- Release the fasteners (E), then pull back the carpet from under the dashboard.
- Remove both rear seat belts (F) through the slit in the carpet, and release the fasteners (G) for both rear side trim panels.
Carpet Replacement (cont'd)20-86
|
Body20-1
Interior Trim20-75 |