Interior Lights 22A-106
|
Body Electrical22A-1
Interior Lights 22A-106 |
Interior Lights 22A-106
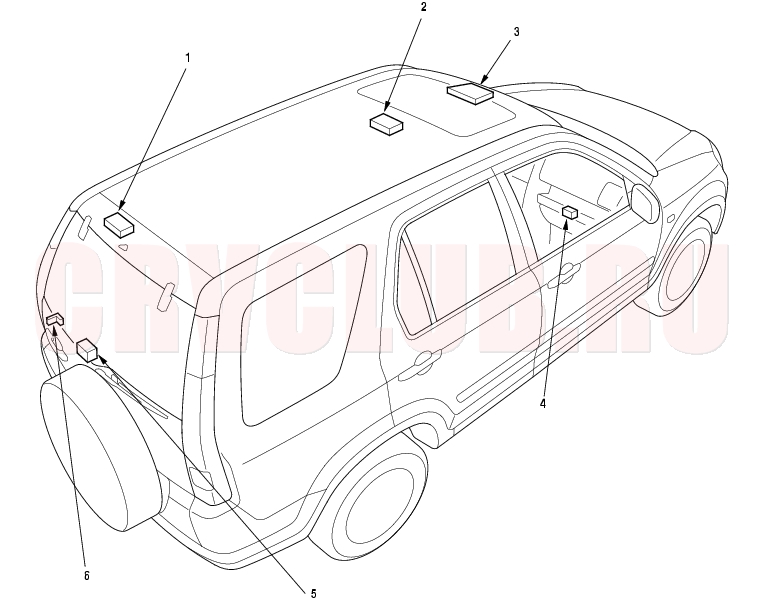
Component Location Index
NOTE: LHD type is shown, RHD type is similar.
Test, page 22A-118 ; Replacement, page 22A-118 Test, page 22A-118 ; Replacement, page 22A-118 Test, page 22A-116 ; Replacement, page 22A-116 Test, page 22A-118 ; Replacement, page 22A-118 Test, page 22A-119 ; Replacement, page 20-166 Test, page 22A-120 ; Replacement, page 22A-120
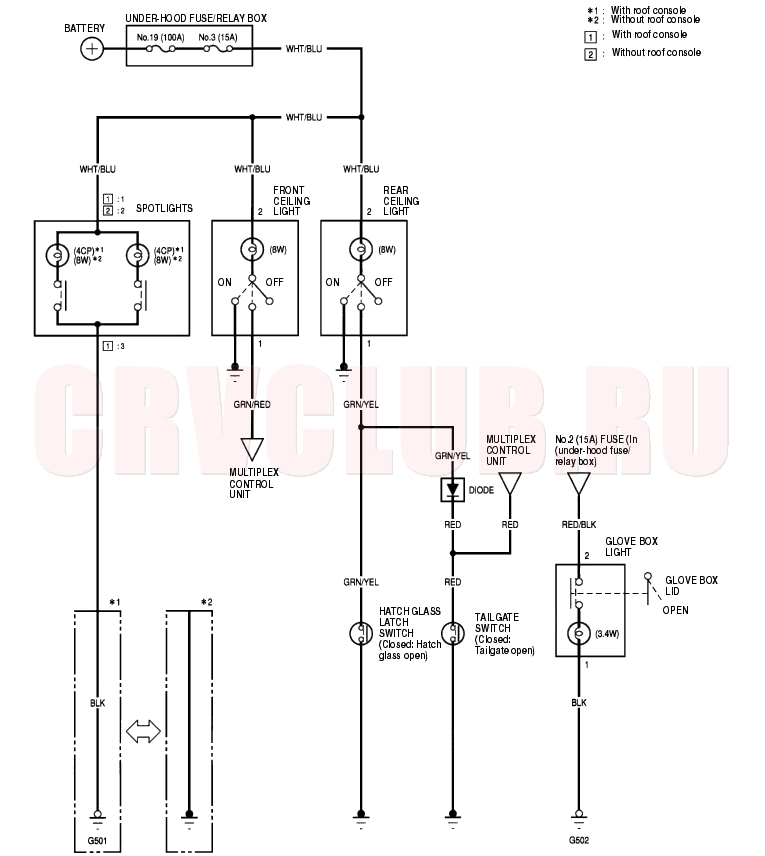
Circuit Diagram 22A-107
Spotlights Test/Replacement 22A-108
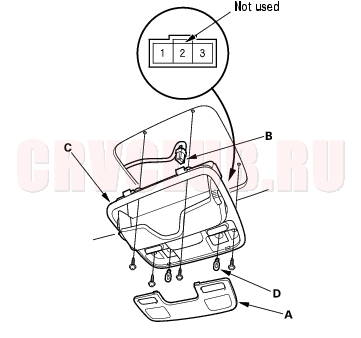
With Roof Console:
Spotlight: 4CP
- Remove the four mounting screws.
- Disconnect the 3P connector (B) from the housing (C).
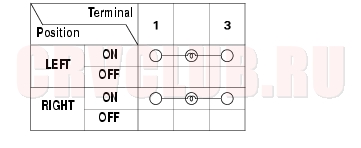
- Check for continuity between the terminals in each switch position according to the table.
- If the continuity is not as specified, check the bulb (D). If the bulb is OK, replace the light.
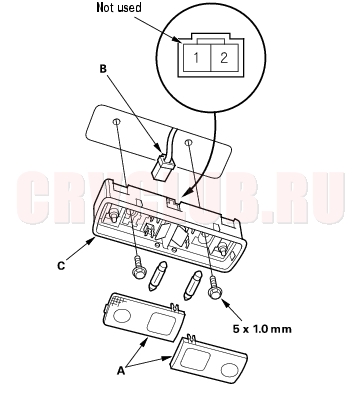
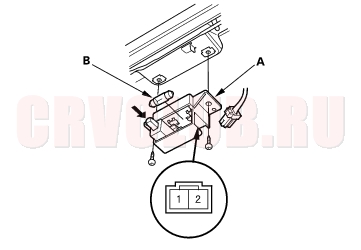
Without Roof Console:
Spotlight: 8 W x 2
- Remove the two mounting bolts.
- Disconnect the 2P connector (B) from the housing (C).
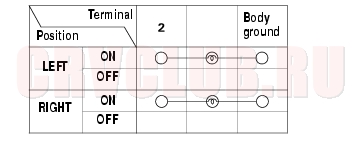
- Check for continuity between the terminals in each switch position according to the table.
- If the continuity is not as specified, check the bulb (D). If the bulb is OK, replace the light.
- When installing the spotlights housing, if the threads in the ET screw are worn out, use an oversized ET screw made specifically for this application.
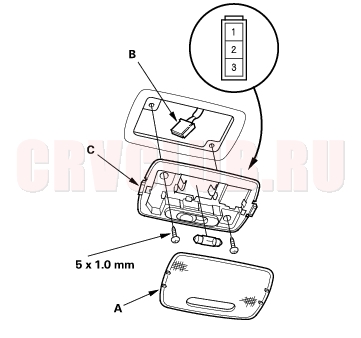
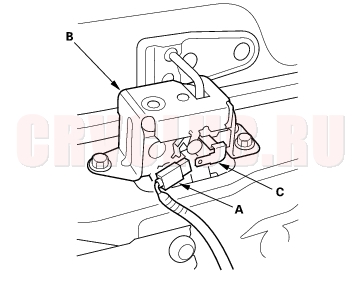
Ceiling Light Test/Replacement 22A-109
Ceiling Light: 8 W
- Remove the two mounting screws.
- Disconnect the 3P connector (B) from the housing (C).
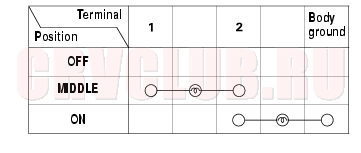
- Check for continuity between the terminals in each switch position according to the table.
- When installing the ceiling light housing, if the threads in the ET screw are worn out, use an oversized ET screw made specifically for this application.
Glove Box Light Test/Replacement 22A-109
Glove Box Light: 3.4 W
- Check for continuity between the No. 1 and No. 2 terminals.
- There should be continuity with the switch released.
- There should be no continuity with the switch pushed.
- If the continuity is not as specified, check the bulb (B). If the bulb is OK, replace the light.
Hatch Glass Latch Switch Test 22A-110
- Remove the tailgate lower trim panel (see page 20-80) .
- Push the hatch glass opener switch, and open the hatch glass.
- Disconnect the connector (A) from the hatch glass opener (B).
- Check for continuity between the opener switch positive terminal (C) and body ground.
- There should be continuity with the hatch glass opened.
- There should be no continuity with the hatch glass closed.
- If the continuity is not as specified, replace the hatch glass latch switch.
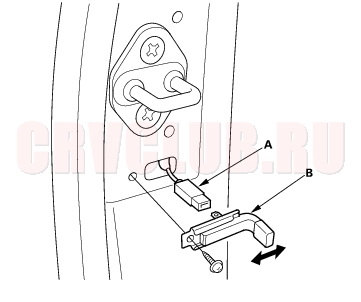
Tailgate Switch Test/Replacement 22A-110
- Open the tailgate.
- Remove the mounting screw from the tailgate switch.
- Disconnect the connector (A) from the tailgate switch (B).
- Check for continuity between the tailgate switch positive terminal (C) and body ground.
- There should be continuity with the switch released (tailgate open position).
- There should be no continuity with the switch pushed (tailgate open position).
- If the continuity is not as specified, replace the tailgate switch.
|
Body Electrical22A-1
Interior Lights 22A-106 |