Openers20-158
|
Body20-1
Openers20-158 |
Openers20-158
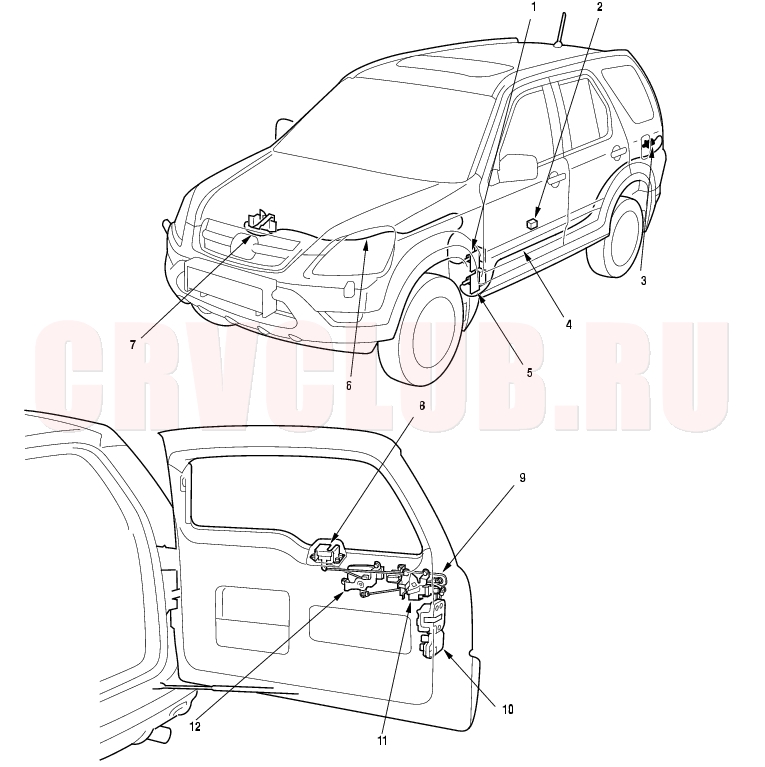
Component Location Index
page 20-159
Replacement, page 20-162 Test, (see page 22A-181)
Replacement, page 20-166 page 20-160
Replacement, page 20-163 Replacement, page 20-160
Replacement, page 20-164 page 20-160
Replacement, page 20-165 Replacement, page 20-159
Replacement, page 20-167
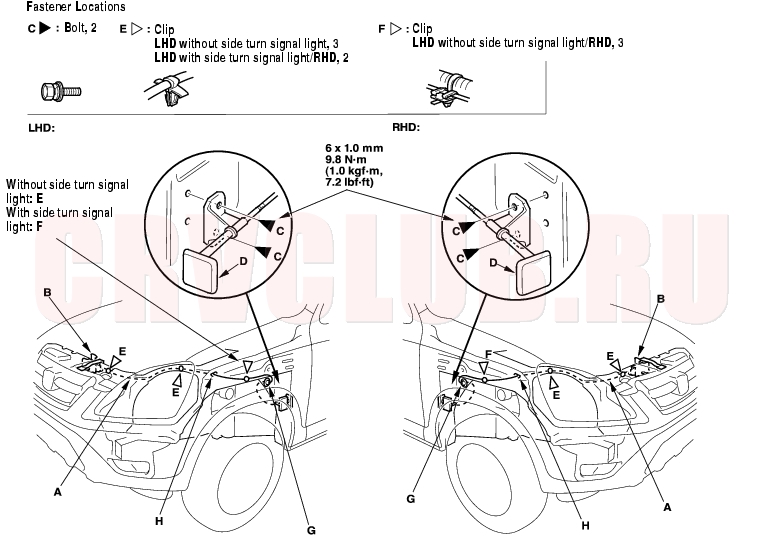
Hood Opener Cable Replacement20-159
Put on gloves to protect your hands. Take care not to scratch the body and related parts.
- Remove these items:
- Front inner fender (see page 20-155)
- Kick panel (see page 20-76)
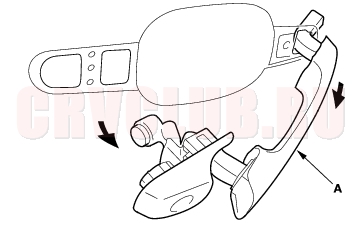
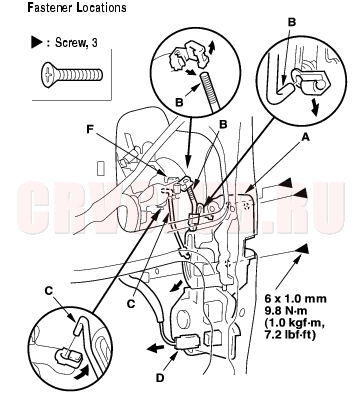
- Disconnect the hood opener cable (A) from the hood latch (B) (see page 20-162) , and remove the bolts (C), then remove the hood release handle (D).
- Using a clip remover, detach the clips (E), and remove the cable from the clip (F). Remove the grommet (G) from the body, then remove the hood opener cable from the vehicle. Take care not to bend the cable.
- Install the cable in the reverse order of removal, and note these items:
- Replace any damaged clips.
- Route the cable through the hole (H) in the body.
- Make sure the hood opens properly and locks securely.
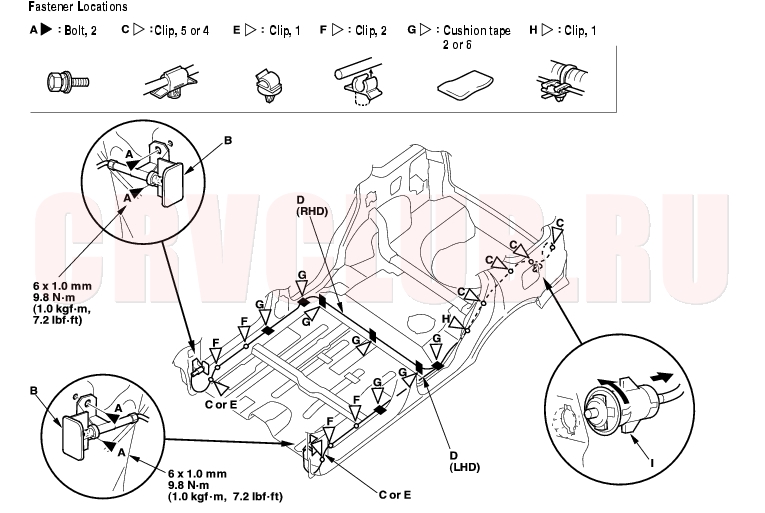
Fuel Fill Door Opener Cable Replacement20-160
SRS components are located in this area. Review the SRS component locations (see page 23-14) , and the precautions and procedures (see page 23-16) in the SRS section before performing repairs or service.
Put on gloves to protect your hands. Take care not to scratch the body and related parts.
- Remove these items:
- Front door sill trim (see page 20-76)
- Kick panel (see page 20-76)
- Rear door sill trim (see page 20-76)
- Center pillar lower trim (see page 20-76)
- Rear seat (see page 20-114)
- Rear side trim panel, left side (see page 20-77)
- Pull the carpet back as necessary (see page 20-85) .
- Remove the bolts (A), then remove the opener (B). Detach the clip (C) (for some models) by using a clip remover, and remove the fuel fill door opener cable (D) from the clips (E, F).
- Remove the cushion tape (G). Remove the cable from the clip (H), and detach the clips (C) by using a clip remover.
- Remove the fuel fill door latch (I) from the body by turning it 90°, then remove the fuel fill door opener cable from the vehicle. Take care not to bend the cable.
20-161
- Install the opener cable (A) in the reverse order of removal, and note these items:
- Replace any damaged clips, and replace the cushion tape.
- Align the mark (B) on the cable with the clips and cushion tape. At the bottom of the center pillar, align the front cushion tape (C) with the hole (D) in the body, and or RHD, align rear cushion tape (E) with a harness clip (F).
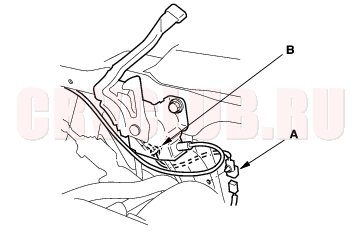
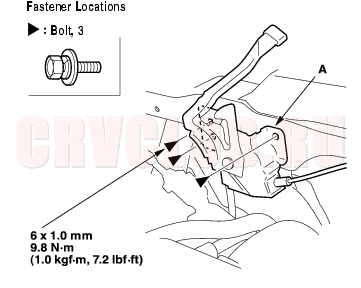
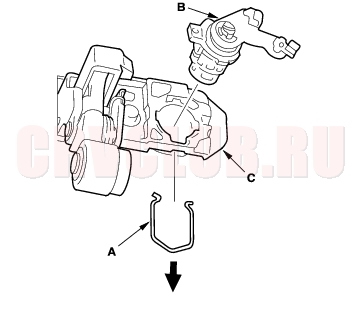
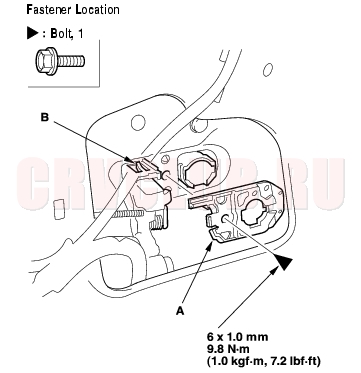
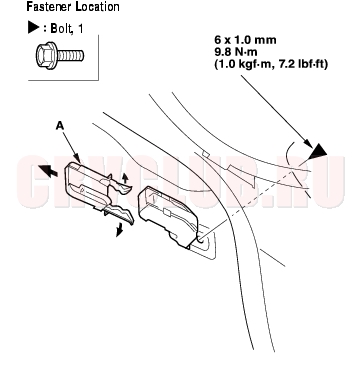
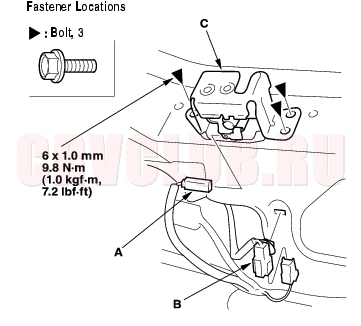
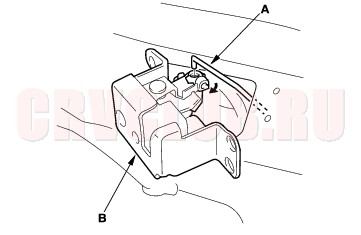
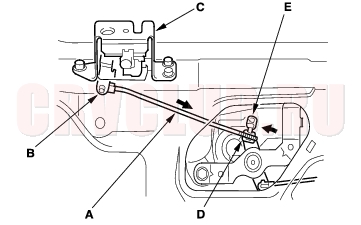
Hood Latch Replacement20-162
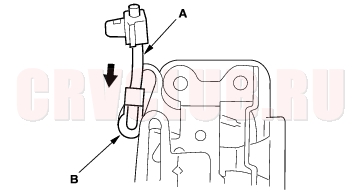
- If equipped, detach the hood latch switch connector (A) and the harness clip (B) from the body, and disconnect the connector.
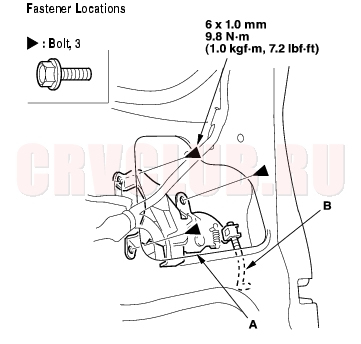
- Remove the bolts, then remove the hood latch (A) from the body.
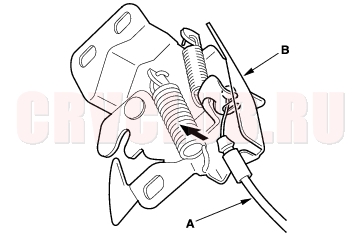
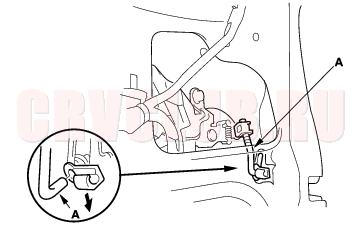
- Disconnect the hood opener cable (A) from the hood latch (B). Take care not to bend the cable.
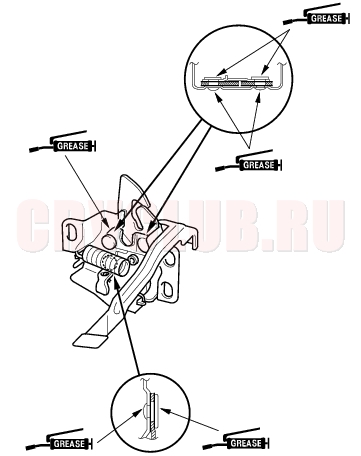
- Install the hood latch in the reverse order of removal, and note these items:
- Grease each location of the hood latch indicated by the arrows.
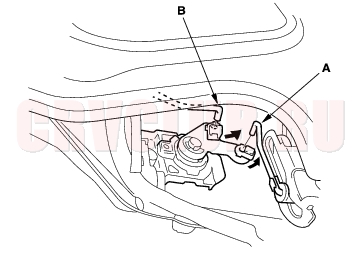
- Make sure the hood opener cable is connected properly and hood latch switch connector is plugged in properly (for some models).
- Adjust the hood latch alignment (see page 20-132) .
- Make sure the hood opens properly and locks securely.
Tailgate Handle Replacement20-163
Take care not to scratch the tailgate. Put on gloves to protect your hands.
- Remove the tailgate stopper assembly (see page 20-165) .
- Disconnect the cylinder rod (A) and the hatch glass open rod (B) from the tailgate lock cylinder (C).
- Release the retainer clip (A) with a hooked shaped tool, then remove the lock cylinder (B) from the tailgate handle (C).
- Remove the bolt securing the cylinder protector (A) and tailgate handle. Release the hook (B), then remove the protector.
- Remove the bolt securing the tailgate handle, and remove the spacer (A).
Tailgate Handle Replacement (cont'd)20-164
- Remove the outer handle (A) while pulling it as shown.
- Install the tailgate handle in the reverse order of removal, and note these items:
- Make sure each rod is connected securely.
- Make sure the tailgate locks and opens properly.
- Install the lock cylinder retaining clip on the handle, then install the lock cylinder. Be sure the clip is fully seated in the slot on the lock cylinder.
Tailgate Latch Replacement20-164
Take care not to scratch the tailgate. Put on gloves to protect your hands.
- Remove the tailgate lower trim panel (see page 20-80)
- Remove the tailgate latch (A).
- Disconnect the tailgate rod (B) and cylinder rod (C).
- Disconnect the actuator connector (D).
- Remove the screws securing the latch.
- Remove the latch through the hole in the tailgate.Take care not to bend the tailgate rod and cylinder rod.
20-165
- Install the latch in the reverse order of removal, and note these items:
- Make sure the actuator connector is plugged in properly, and each rod is connected securely.
- If the tailgate rod (A) was disconnected at the upper end (the tailgate stopper assembly side), reconnect it with its lower end on the bottom of a hole in the lever (B).
- Make sure the tailgate locks and opens properly.
Tailgate Stopper Assembly Replacement20-165
Take care not to scratch the tailgate. Put on gloves to protect your hands.
- Remove the tailgate lower trim panel (see page 20-80)
- Disconnect the tailgate rod (A) at the lower end from the tailgate latch.
- Remove the bolt, then remove the tailgate stopper assembly (A).
- If necessary, disconnect the tailgate rod (B) from the tailgate stepper assembly.
Tailgate Stopper Assembly Replacement (cont'd)20-166
- Install the stopper assembly in the reverse order of removal, and note these items:
- Make sure the tailgate rod is connected securely. If you removed the tailgate rod from the tailgate stopper assembly, adjust the rod when reinstalling it (see step 3 on page 20-165 ).
- Make sure the tailgate opens properly.
Hatch Glass Latch Replacement20-166
Take care not to scratch the tailgate. Put on gloves to protect your hands.
- Remove the tailgate lower trim panel (see page 20-80)
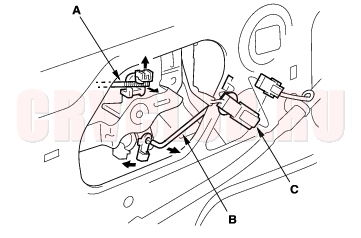
- Disconnect the hatch glass latch switch connector (A), hatch glass latch connector (B), and detach the hatch glass latch connector from the tailgate.
- Remove the bolts, then pull the hatch glass latch (C) out.
- Disconnect the hatch glass rod (A), than remove the hatch glass latch (B).Take care not to bend the rod.
- Install the latch in the reverse order of removal, and note these items:
- Make sure each connector is plugged in properly, and the rod is connected properly.
- Make sure the hatch glass opens properly and locks securely.
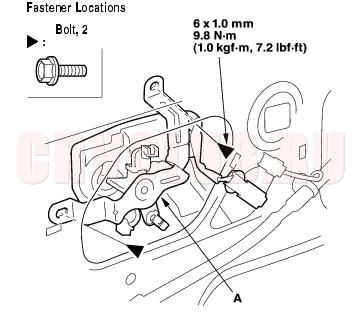
Hatch Glass Actuator Replacement20-167
Take care not to scratch the tailgate. Put on gloves to protect your hands.
- Remove the tailgate lower trim panel (see page 20-80)
- Disconnect the hatch glass rod (A), hatch glass open rod (B), and actuator connector (C), then detach the connector from the tailgate.
- Remove the bolts, then remove the hatch glass actuator (A).
- Install the actuator in the reverse order of removal, and note these items:
- Make sure the actuator connector is plugged in properly, and each rod is connected securely.
- Reconnect the hatch glass rod (A) as following sequence.
- Move the lever (B) of the latch (C) into lock position.
- While holding the lever (B) into lock position, take off the looseness on the latch side of the rod by pulling the rod in direction shown by the arrow.
- Move the lever (D) of the actuator into set position as shown by the arrow.
- Connect the rod to the fastener (E) of the lever.
- Make sure the hatch glass opens properly and locks securely.
|
Body20-1
Openers20-158 |