Cooling System10-2
|
Engine Cooling10-1
Cooling System10-2 |
Cooling System10-2
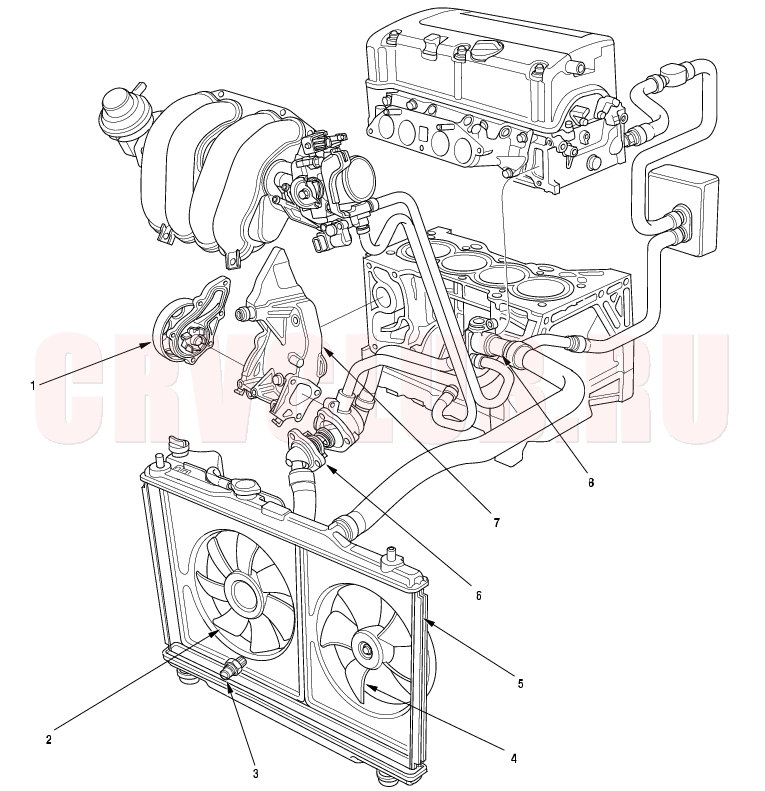
Component Location Index
Inspection, page 10-5 ; Replacement, page 10-5 Replacement, page 10-10 ; Fan Motor Test, page 10-4 Test, page 10-17 ; Replacement, page 10-17 Replacement, page 10-10 ; Fan Motor Test, page 10-4 Replacement page 10-10 Test, page 10-4 ; Replacement, page 10-8 Installation, page 10-9 Installation, page 10-9
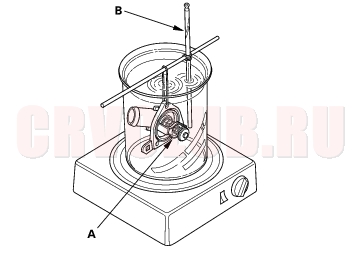
Radiator Cap Test10-3
- Remove the radiator cap (A), wet its seal with engine coolant, then install it on the pressure tester (B) (commercially available). Use a small adapter H-901122-09 (C) (commercially available) to install the radiator cap.
- Apply a pressure of 93 - 123 kPa (0.95 - 1.25 kgf/cm², 14 - 18 psi).
- Check for a drop in pressure.
- If the pressure drops, replace the cap.
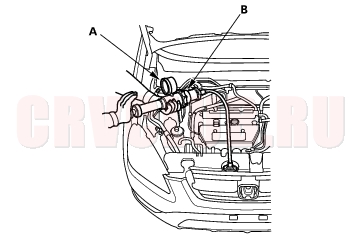
Radiator Test10-3
- Wait until the engine is cool, then carefully remove the radiator cap and fill the radiator with engine coolant to the top of the filler neck.
- Attach the pressure tester (A) (commercially available) to the radiator. Use a small adapter H-901122-09 (B) (commercially available) to attach the pressure tester.
- Apply a pressure of 93 - 123 kPa (0.95 - 1.25 kgf/cm², 14 - 18 psi).
- Inspect for engine coolant leaks and a drop in pressure.
- Remove the tester, and reinstall the radiator cap.
- Check for engine oil in the coolant and/or coolant in the engine oil.
Fan Motor Test10-4
- Disconnect the 2P connectors from the radiator fan motor and condenser fan motor.
- Test the motor by connecting battery power to the B terminal and ground to the A terminal.
- If the motor fails to run or does not run smoothly, replace it.
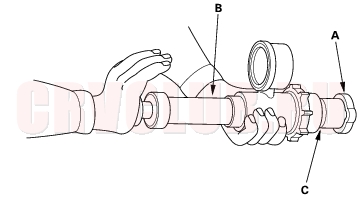
Thermostat Test10-4
Replace the thermostat if it is open at room temperature.
- Suspend the thermostat (A) in a container of water. Do not let the thermometer (B) touch the bottom of the hot container.
- Heat the water, and check the temperature with a thermometer. Check the temperature at which the thermostat first opens, and at which it is fully open.
- Measure the lift height of the thermostat when it is fully open.
STANDARD THERMOSTAT
Lift height: above 8.0 mm (0.31 in.)
Starts opening: 76 - 80°C (169 - 176°F)
Fully open: 90°C (194°F)
Water Pump Inspection10-5
- Remove the drive belt (see page 04-30) .
- Turn the water pump pulley counterclockwise. Check that it turns freely.
- Check for signs of seal leakage. A small amount of ''weeping'' from the bleed hole (A) is normal.
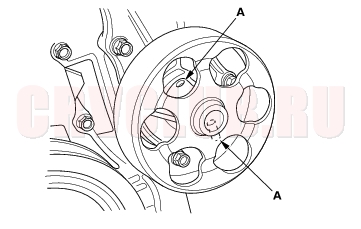
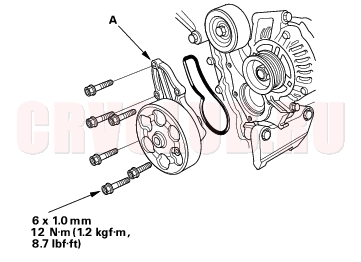
Water Pump Replacement10-5
- Remove the drive belt (see page 04-30) .
- Drain the engine coolant (see page 10-6) .
- Remove the crankshaft pulley (see page 06-11) .
- Remove the six bolts securing the water pump, then remove the water pump (A).
- Inspect and clean the O-ring groove and mating surface with the water passage.
- Install the water pump with new O-rings in the reverse order of removal.
- Clean up any spilled engine coolant.
- Install the crankshaft pulley (see page 06-12) .
- Refill the radiator with engine coolant, and bleed air from the cooling system with the heater valve open (see page 10-6) .
Coolant Check10-6
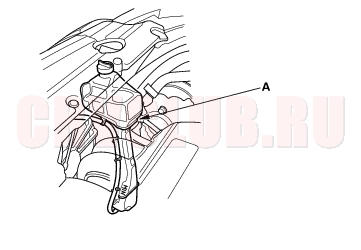
- Look at the coolant level in the reserve tank. Make sure it is between the MAX mark (A) and MIN mark (B).
- If the coolant level in the reserve tank is at or below the MIN mark, add coolant to bring it up to the MAX mark, and inspect the cooling system for leaks.
Coolant Replacement10-6
- Start the engine. Set the heater temperature control dial to maximum heat, then turn off the ignition switch. Make sure the engine and radiator are cool to the touch.
- Remove the bulkhead cover (see step 7 on page 09-4 ).
- Remove the splash shield (see step 21 on page 05-6 ).
- Remove the radiator cap.
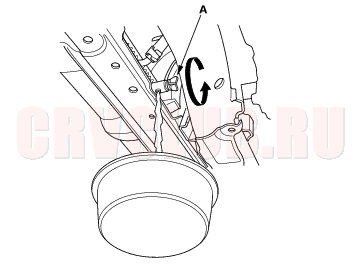
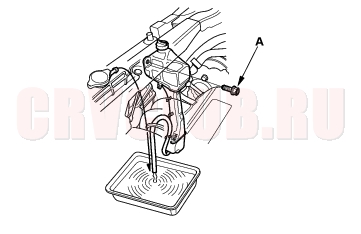
- Loosen the drain plug (A), and drain the coolant.
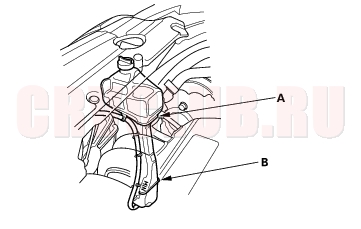
- Remove the reserve tank mounting bolt (A), and remove the reserve tank.
- Remove the coolant tube from the radiator, then put the end of the coolant tube lower the reserve tank and drain the coolant in the tank.
10-7
- After the coolant has drained, tighten the radiator drain plug, and reinstall the coolant tube and reserve tank.
- Install the splash shield (see step 22 on page 05-14 ).
- Install the bulkhead cover (see step 4 on page 09-6 ).
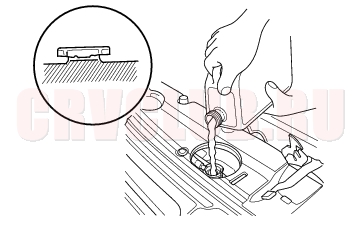
- Fill the reserve tank to the MAX mark (A) with genuine Honda All Season Antifreeze/Coolant Type 2.
- Pour genuine Honda All Season Antifreeze/Coolant Type 2 into the radiator up to the base of the filler neck.
- NOTE:
- Always use genuine Honda All Season Antifreeze/Coolant Type 2. Using a non-Honda coolant can result in corrosion, causing the cooling system to malfunction or fail.
- Genuine Honda All Season Antifreeze/Coolant Type 2 is a mixture of 50% antifreeze and 50% water. Pre-mixing is not required.
Engine Coolant Refill Capacity [including the reserve tank capacity of 0.55 l (0.58 US qt, 0.48 lmp qt)]:
K20A4, K20A5 engines:
M/T: 5.4 l (5.7 US qt, 4.8 lmp qt)
A/T: 5.3 l (5.6 US qt, 4.7 lmp qt)
K24A1 engine:
M/T: 5.5 l (5.8 US qt, 4.8 lmp qt)
A/T: 5.4 l (5.7 US qt, 4.8 lmp qt)
- Install the radiator cap loosely.
- Start the engine, and let it run until it warms up (the radiator fan comes on at least twice).
- Turn off the engine. Check the level in the radiator and add genuine Honda All Season Antifreeze/Coolant Type 2 if needed.
- Put the radiator cap on tightly, then run the engine again and check for leaks.
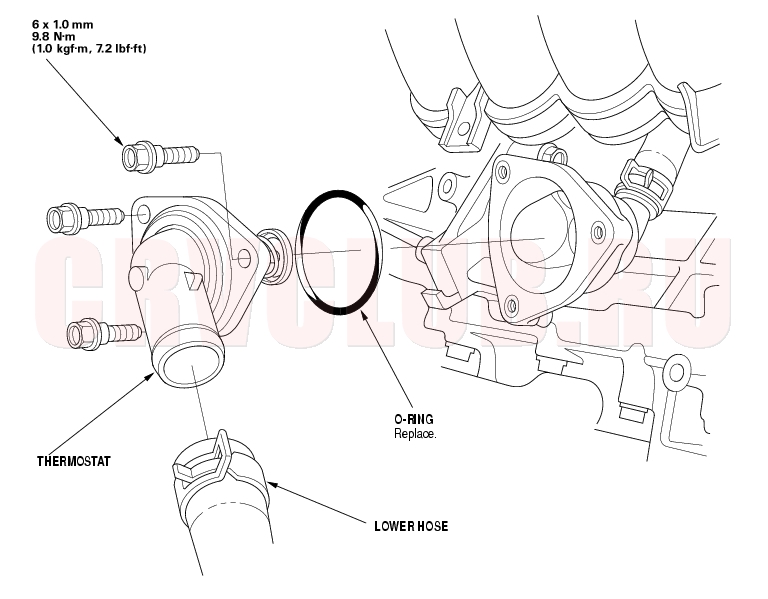
Thermostat Replacement10-8
- Drain the engine coolant (see page 10-6) .
- Remove the splash shield (see step 21 on page 05-6 ).
- Remove the lower hose, then remove the thermostat.
- Install the thermostat with a new O-ring, then install the lower hose.
- Install the splash shield (see step 22 on page 05-14 ).
- Refill the radiator with engine coolant, and bleed air from the cooling system with the heater valve open (see page 10-6) .
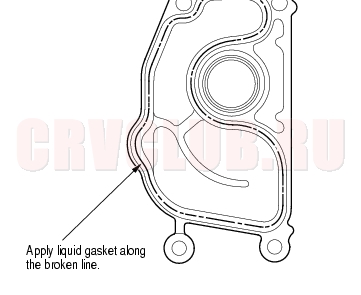
Water Passage Installation10-9
- Clean and dry the water passage mating surfaces.
- Apply liquid gasket, 08C70-K0234M, 08C70-K0334M or 08C70-X0331S, evenly to the cylinder block mating surface of the water passage and to the inner threads of the bolt holes.
- NOTE: Do not install the parts if 5 minutes or more have elapsed since applying liquid gasket. Instead, reapply liquid gasket after removing old residue.
- Install the water passage (A) with a new O-ring (B).
- After assembly, wait at least 30 minutes before filling the engine with oil.
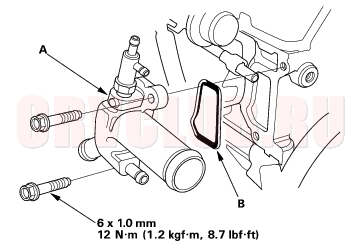
Water Outlet Installation10-9
Install the water outlet (A) with a new O-ring (B).
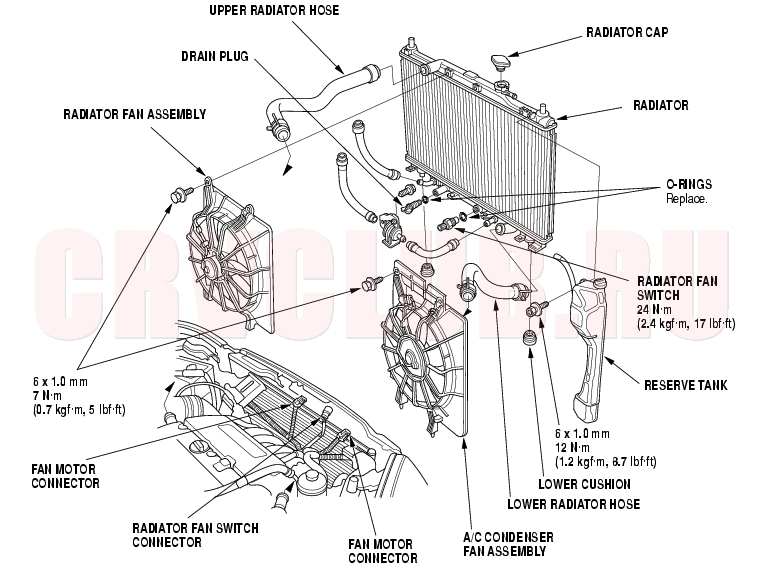
Radiator and Fans Replacement10-10
- Drain the engine coolant (see page 10-6) .
- Remove the bulkhead cover (see step 7 on page 09-4 ).
- Remove the upper bracket cushion, then remove the bulkhead (see step 9 on page 09-5 ).
- Remove the upper radiator hose and lower radiator hose.
- Disconnect the fan motor connectors and radiator fan switch connector, then pull up the radiator.
- Remove the fan shroud assemblies and other parts from the radiator.
- Install the radiator in the reverse order of removal. Make sure the upper and lower cushions are set securely.
- Install the bulkhead in the reverse order of removal. Apply body paint to the bulkhead mounting bolts.
- Fill the radiator with engine coolant and bleed the air (see page 10-6) .
|
Engine Cooling10-1
Cooling System10-2 |